- File manager for Mac
- Best Terminal Emulator for Mac: Top solution in 2026
Best Terminal Emulator for Mac: Top solution in 2026
The terminal is a powerful tool that allows users to interact with the operating system and execute various tasks through the Command Line Interface (CLI). However, when using the terminal, you should know and understand its commands and functions so as not to mess up the system.
macOS includes its own Terminal app and works just fine. However, while the native terminal is enough for some users, others are looking for something with additional features and options. With that in mind, we’ve compiled a list of alternatives to Terminal on Mac.
User question:
I have been trying to replace the default Terminal on my app, because I want to get more features, like many tiles, browcasting input to all my sessions and so for. In Ubuntu I use Terminator, and that works really great. I have installed Terminator with brew in my Mac and it doesn't work at all, but before wasting my time in troubleshooting that installation I wanted to ask you what do you recommend as a terminal app?— from Reddit
How to open terminal on macOS: 4 different ways
If you want to open Terminal on Mac then you should be aware that it can be done the same way as you open any other programs and in different ways. Below you can find the detailed list of how to open Terminal on your Mac computer.
1. By using Finder
The most direct way is to open Mac Terminal from a general list of programs. To do this, open Finder, select Applications and find the Utilities folder in the list of all programs that will open. Here you will find Terminal.app application. Double-click to open it.
2. By using the Spotlight search bar
Launch Spotlight by holding down the Command + Space bar shortcut at the same time, and in the pop-up window, start typing the word “Terminal”. You will see the application you need, just click on it to make Terminal open.
3. By using Launchpad
Open Launchpad from the Dock and go to the “Others” folder. Here you will find the Terminal.app. Click it to open.
4. By using Siri
Another easiest way to open Terminal on Mac is of course by using Siri. Select the Siri icon on the menu bar or open Siri from the Applications folder. Here you need just to say: “Open Terminal”. That’s it.
List of the best Terminal emulator Mac solutions ⭐
Commander One
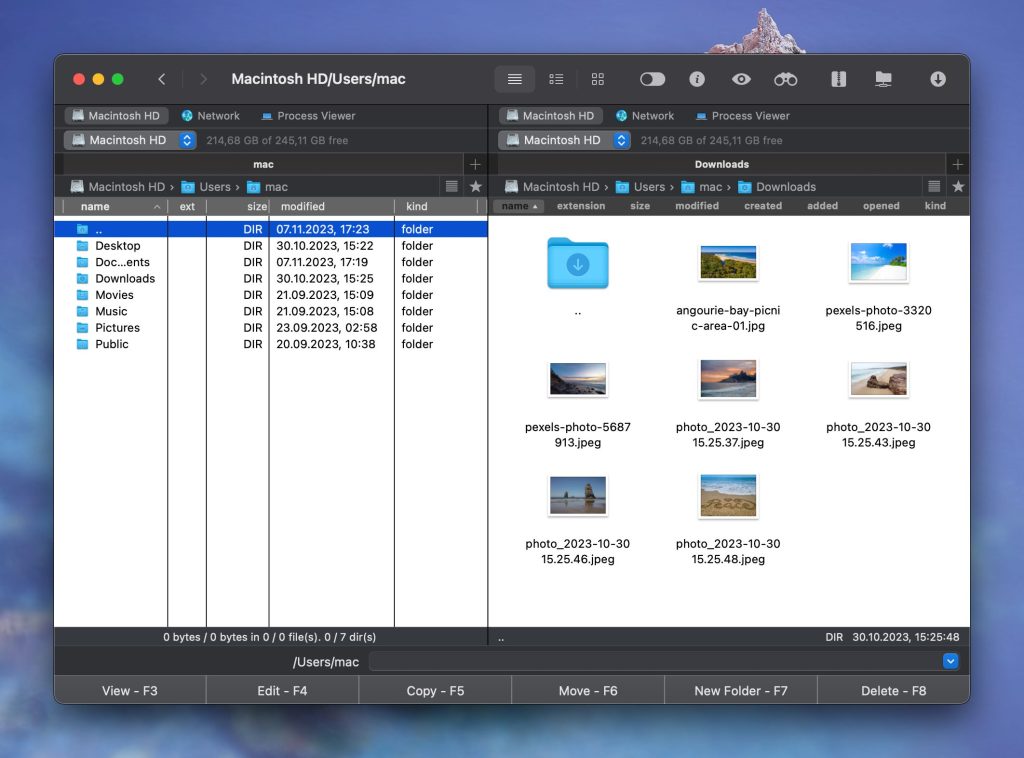
Commander One is considered the best file manager for Mac. The app comes with the built-in Terminal emulator and offers a great variety of features to facilitate the work with your data both on your computer and online, as it supports the work with cloud storages and remote servers.
Commander One has a flexible Terminal configuration allowing you to open it with the help of a hotkey. This Mac Terminal emulator includes all the necessary capabilities, as a great plus is that you do not need to switch between applications while working with it, as all the terminal commands can be executed directly from the application window.
Price: free, Pro version costs $29.99
Supported OS: macOS
Latest update: Oct 13, 2025
Pros
- Highly customizable
- Cloud storage integration
- Support for iOS/Android devices
Cons
- Multi-rename feature is absent
- Synchronize directories feature is absent
ZOC
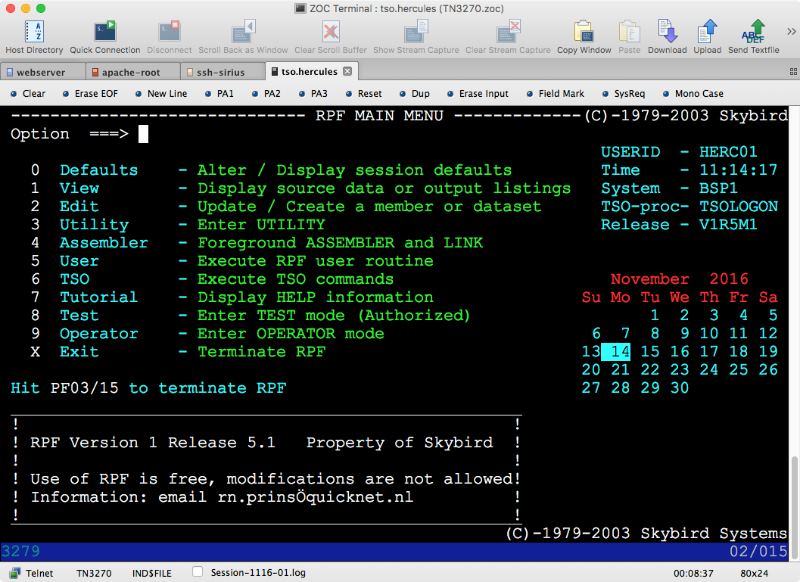
ZOC is a TELNET / SSH / SSH2 client and Terminal emulator for Mac. The app offers many functions, including support for multiple sessions, rollback, support for creating several separate processes, support for full-color Xterm emulation, meta keys, VT102, VT220, scripts in REXX and other languages, and much more. Due to an impressive list of emulations and features, it is not difficult to access hosts and mainframes through a secure shell, telnet, serial cable, modem / isdn, and other communication methods.
Price: $79.99 for lifetime license
Supported OS: Windows and macOS
Latest update: Nov 24, 2025
Pros
- Ability to work with the mouse mode
- History of commands
- Ability to automatically connect
Cons
- The only drawback is that it is not free
MacTerm
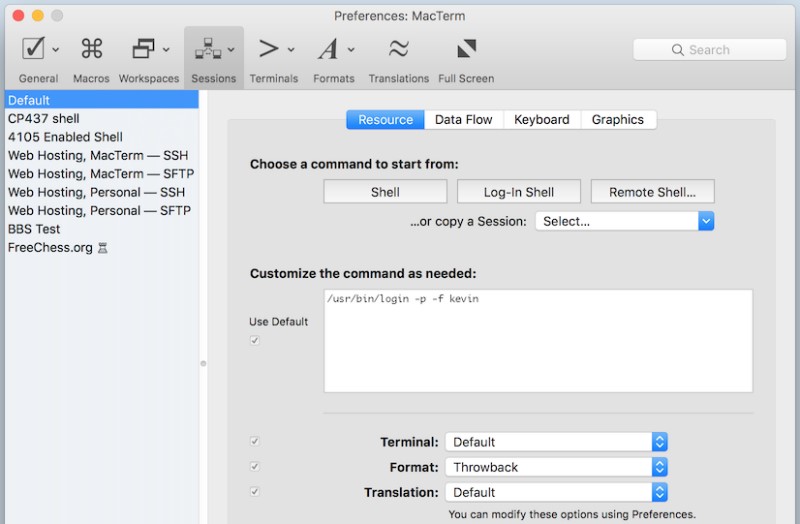
MacTerm previously known as MacTelnet is one more best terminal app for mac. With its help, you can access both local and remote applications. The app has an impressive list of features, including powerful terminals (with or without tabs), a very flexible setting system, dynamic search, support for macros, floating command line window and much more.
Price: $79.99 for lifetime license
Supported OS: Windows and macOS
Latest update: Jul 3, 2024
Pros
- Highly customizable
- Growl integration
- Session manager
Cons
- The version for macOS 10.15 and later is still under development
PowerTerm InterConnect
PowerTerm InterConnect is a fairly powerful and user-friendly Terminal for Mac that maximizes the capabilities of the native Terminal.app on the Mac. The application supports a wide range of hosts and mainframes, including IBM Mainframe, IBM AS / 400, UNIX, OpenVMS, Tandem, ANSI, Data General, Wyse, Televideo and others. In addition, terminal emulation can be established via various communication modes, including TN3270, TN5250, Microsoft SNA Server and Telnet.
Price: $174.99 for lifetime license
Supported OS: Windows and macOS
Latest update: June, 2021
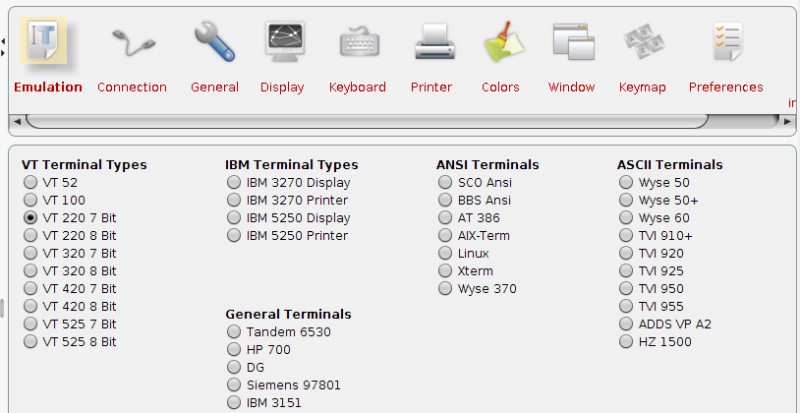
Pros
- Multiple simultaneous sessions
- Scripts
- Customizable function keys
- Smart copy and paste
- SSH and SSL security
Cons
- High price of this Terminal app Mac solution
iTerm
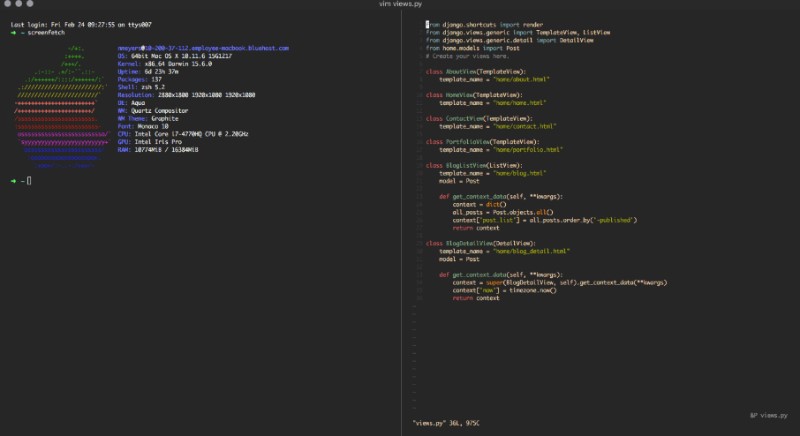
iTerm has a set of useful features that make it the best terminal program for Mac. The app supports tabs, split panes, configurable scrollback, autocomplete features, etc. Besides that iTerm2 gives you unlimited independent terminals in one tab. In addition, by default the app offers opening windows in full-screen mode, nevertheless, it is possible to use custom full-screen windows.
Price: free
Supported OS: macOS
Latest update: Nov 17, 2025
Pros
- Autocomplete features
- Growl integration
- Great mouse and clipboard support
Cons
- Doesn't support RTL
- A bit slow compared to the rest of the apps
Kitty
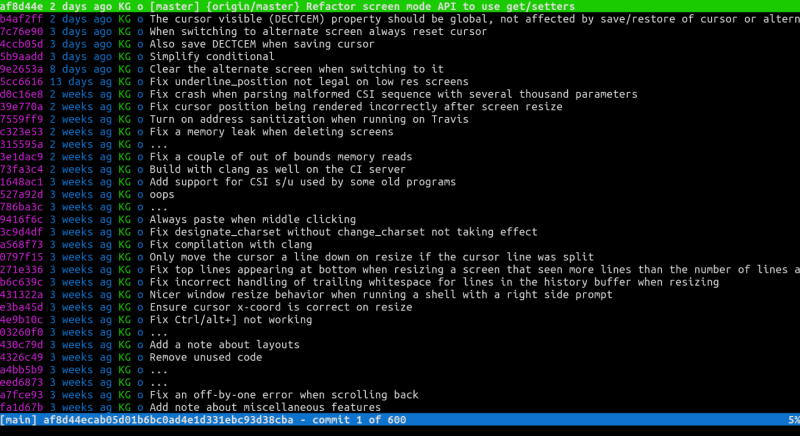
Kitty is a powerful, cross-platform GPU-based and free Mac terminal emulator. The app supports all modern terminal functions, including graphics, Unicode, focus tracking, parentheses and much more. This app can be seamlessly controlled from scripts or command line even through SSH.
As you can see, it includes many features, but the one that should be paid special attention is support for ligatures in code.
Price: free
Supported OS: macOS
Latest update: Nov 11, 2025
Pros
- Cross-platform solution
- Supports the startup session
- Scroll buffer can be opened in a separate window
- Super fast
Cons
- Does not support dynamic reload of configuration
- Does not support bright colors for bold text
Hyper
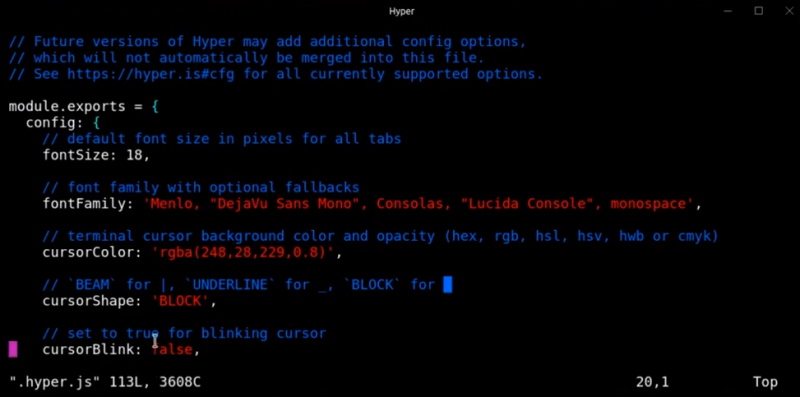
Another cross-platform solution is Hyper formerly known as Hyper. This tiny Terminal app is based on Electron and perhaps this can be called its greatest advantage compared to other terminal emulator Mac solutions because everything that can be done on the web, can also be done in Hyper.
Besides that, Hyper supports a large number of plugins that can help you to extend basic functionalities of the app. In addition, it is able to make Tabs and Split where the latest can be done vertically and horizontally. In conclusion, the latest version of the app began to use WebGL for rendering.
Price: free
Supported OS: macOS, Windows
Latest update: Jul 13, 2023
Pros
- Easy to configure
- Customizable
- Wide variety of themes
- Wide variety of plugins
Cons
- Some themes don't work properly
- Inability to apply some configurations
MacWise
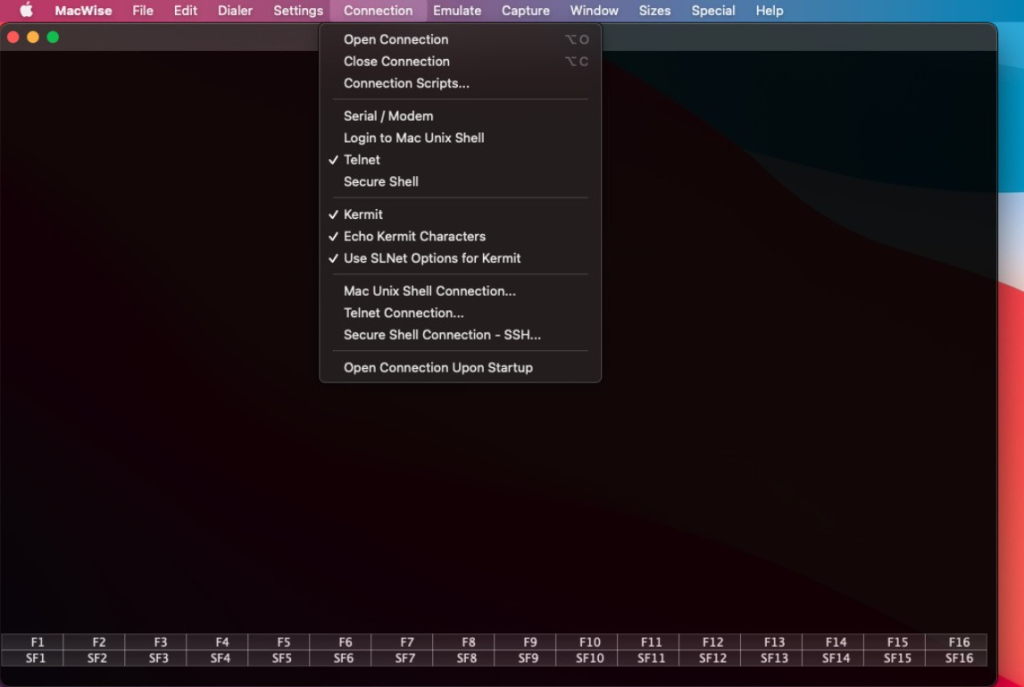
MacWise is a minimalistic Mac OS Terminal emulator designed to work with a large number of different protocols, connection modes (serial / modem, telnet, secure shell, or even Kermit), and can emulate a wide range of terminals, including Prism, TV925, VT100, VT220, Viewpoint, Wyse 50, Wyse 60, Wyse 370.
Besides that, the app allows logging into Mac Unix Shell, if there is a need. MacWise also offers the use of function keys that you can adjust according to your needs or even add special functions. Furthermore, thanks to its intuitive interface you will find MacWise rather easy to use.
Price: The latest version (26) is free. Older versions cost $95.
Supported OS: macOS
Latest update: Jul 20, 2025
Pros
- Ability to run 10 different sessions at the same time
- Ability to manage multiple hosts at the same time
Cons
- High price of the app
Byobu
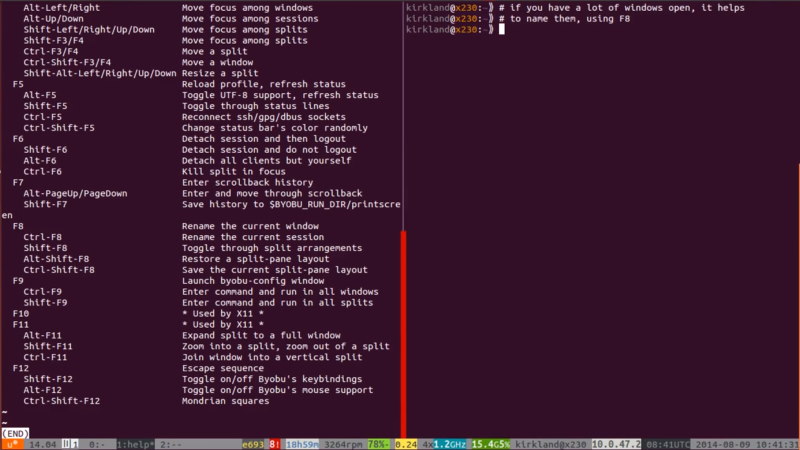
Byobu is a text-based window manager and open-source terminal multiplexer that was originally based on the GNU Screen utility. Its goal is to provide the best user experience for terminal sessions when connecting to remote servers.
While using Byobu, users can quickly create and move between different windows on top of one SSH connection or TTY terminal, monitor a lot of important statistics about their system, disconnect or reconnect to sessions later, while programs continue to work in the background.
Price: free
Supported OS: macOS, Windows and Linux
Latest update: Apr 21, 2021
Pros
- Advanced profiles
- Convenient keyboard shortcuts
- Configuration utilities
- Switchable system status notifications for tmux and GNU Screen
Cons
- Seems to be a bit difficult for use
Comparing Best Terminal Emulator for Mac
| Feature | Commander One | ZOC | MacTerm | PowerTerm InterConnect | iTerm | Kitty | Hyper | MacWise | Byobu |
| Customization | Moderate | High | High | Moderate | High | High | High | Low | Low |
| Multiple Session Handling | |||||||||
| File Management | |||||||||
| Free version |
Why do people look to Mac Terminal alternative?
In macOS, an ordinary user practically does not face the need to use the command line, since most of his needs are covered by what is implemented in the graphical interface of the system. However, if it is needed, the default Mac Terminal application can cope with any task you have for it. However, it lacks some useful features, forcing some users to look for a terminal alternative for Mac.
Luckily, it is not the only one solution that is there on the market and you can find a lot of other alternatives with wider range of features or even can be customized according to your whim.
Command-line Errors and How to Fix Them
In this chapter, we’ll look at some common errors you might encounter when working with the macOS command line and offer solutions to fix them.
Command Not Found
This error occurs due to various reasons, such as a typo, a command that is not installed or is missing from your system’s PATH. Consequently, to fix the error, you should remove the cause: check for typos, make sure that the command is installed, and in case of a command in PATH, edit the shell configuration file.
Permission Denied
It often means you lack the right access to the file or folder you’re trying to modify. It can be fixed by adjusting permissions or changing ownership.
No Such File or Directory
This error indicates that the specified file or directory does not exist.
To handle it, check the path and make sure it is correct.
Argument List Too Long
Occurs when a command receives too many arguments, often due to the use of wildcards that correspond to too many files. Use a more specific pattern to find fewer files.
Disk Full
This error appears when the disk is full and cannot accommodate any more data. Check disk usage and free up space by deleting unnecessary files or directories.
Conclusion
There are many different options you can replace the Mac terminal with. All of the listed alternatives in our article will provide you with all the useful features not found in the native Mac terminal, and give you complete control over your system. For example, Commander One, powerful and versatile terminal app Mac users can find. More than that, it’s a great file manager that works with remote servers and cloud services and handles archives of different formats.
Frequently Asked Questions
We have collected the best Mac terminal alternatives, including Commander One, Zoc, MacTerm etc., and which one to choose depends on your needs and expectations. Our top choice is Commander One. With it, managing all system processes is extremely easy.
First, make sure the zip folder is saved to your desktop. Open a Mac terminal and navigate to the zip location: cd desktop. Next, enter the unpack command: unzip [filename].
- cat – a list of the contents of the file or folder;
- cd – like DOS, use this command to change directories;
- cp – copy a file or folder;
- defaults – this command changes settings that are not specified in the settings;
- ls – this command lists the contents of the directory;
- mkdir – make a directory;
- mv – move the file or folder;
- nano – open the terminal editor.

