- Blog
- File management
- How to find File Path on macOS – Quick methods
How to find File Path on macOS – Quick methods
Files on a computer are organized in a tree-like structure. In the case of Windows OS, finding the path to a file is relatively easy whereas when it comes to macOS, the process is a bit tricky. In this article, we will talk about different ways to view file path on Mac, including the latest macOS Tahoe, so you can choose the most convenient and simple option.
Find file path in Finder
One of the quickest ways to view a file path in Mac is to use the Finder Path Bar, as it is the default file manager on macOS and can be reached with a snap of a finger. Continue with the steps below to learn how to show the file path:
- Open Finder on your Mac
2. Browse to the file or folder you want to view the path to.
3. Select View > Show Path Bar in the menu bar.

4. The path to the current folder will be displayed at the bottom of the Finder window.

Use Terminal to get file path on Mac
If you are not afraid of Terminal and use it from time to time, then this tool can also be useful for getting information about the path to a file. For this:
- Go to Applications – > Utilities.
2. Launch Terminal.
3. When the Terminal window opens, drag your file or folder into it.
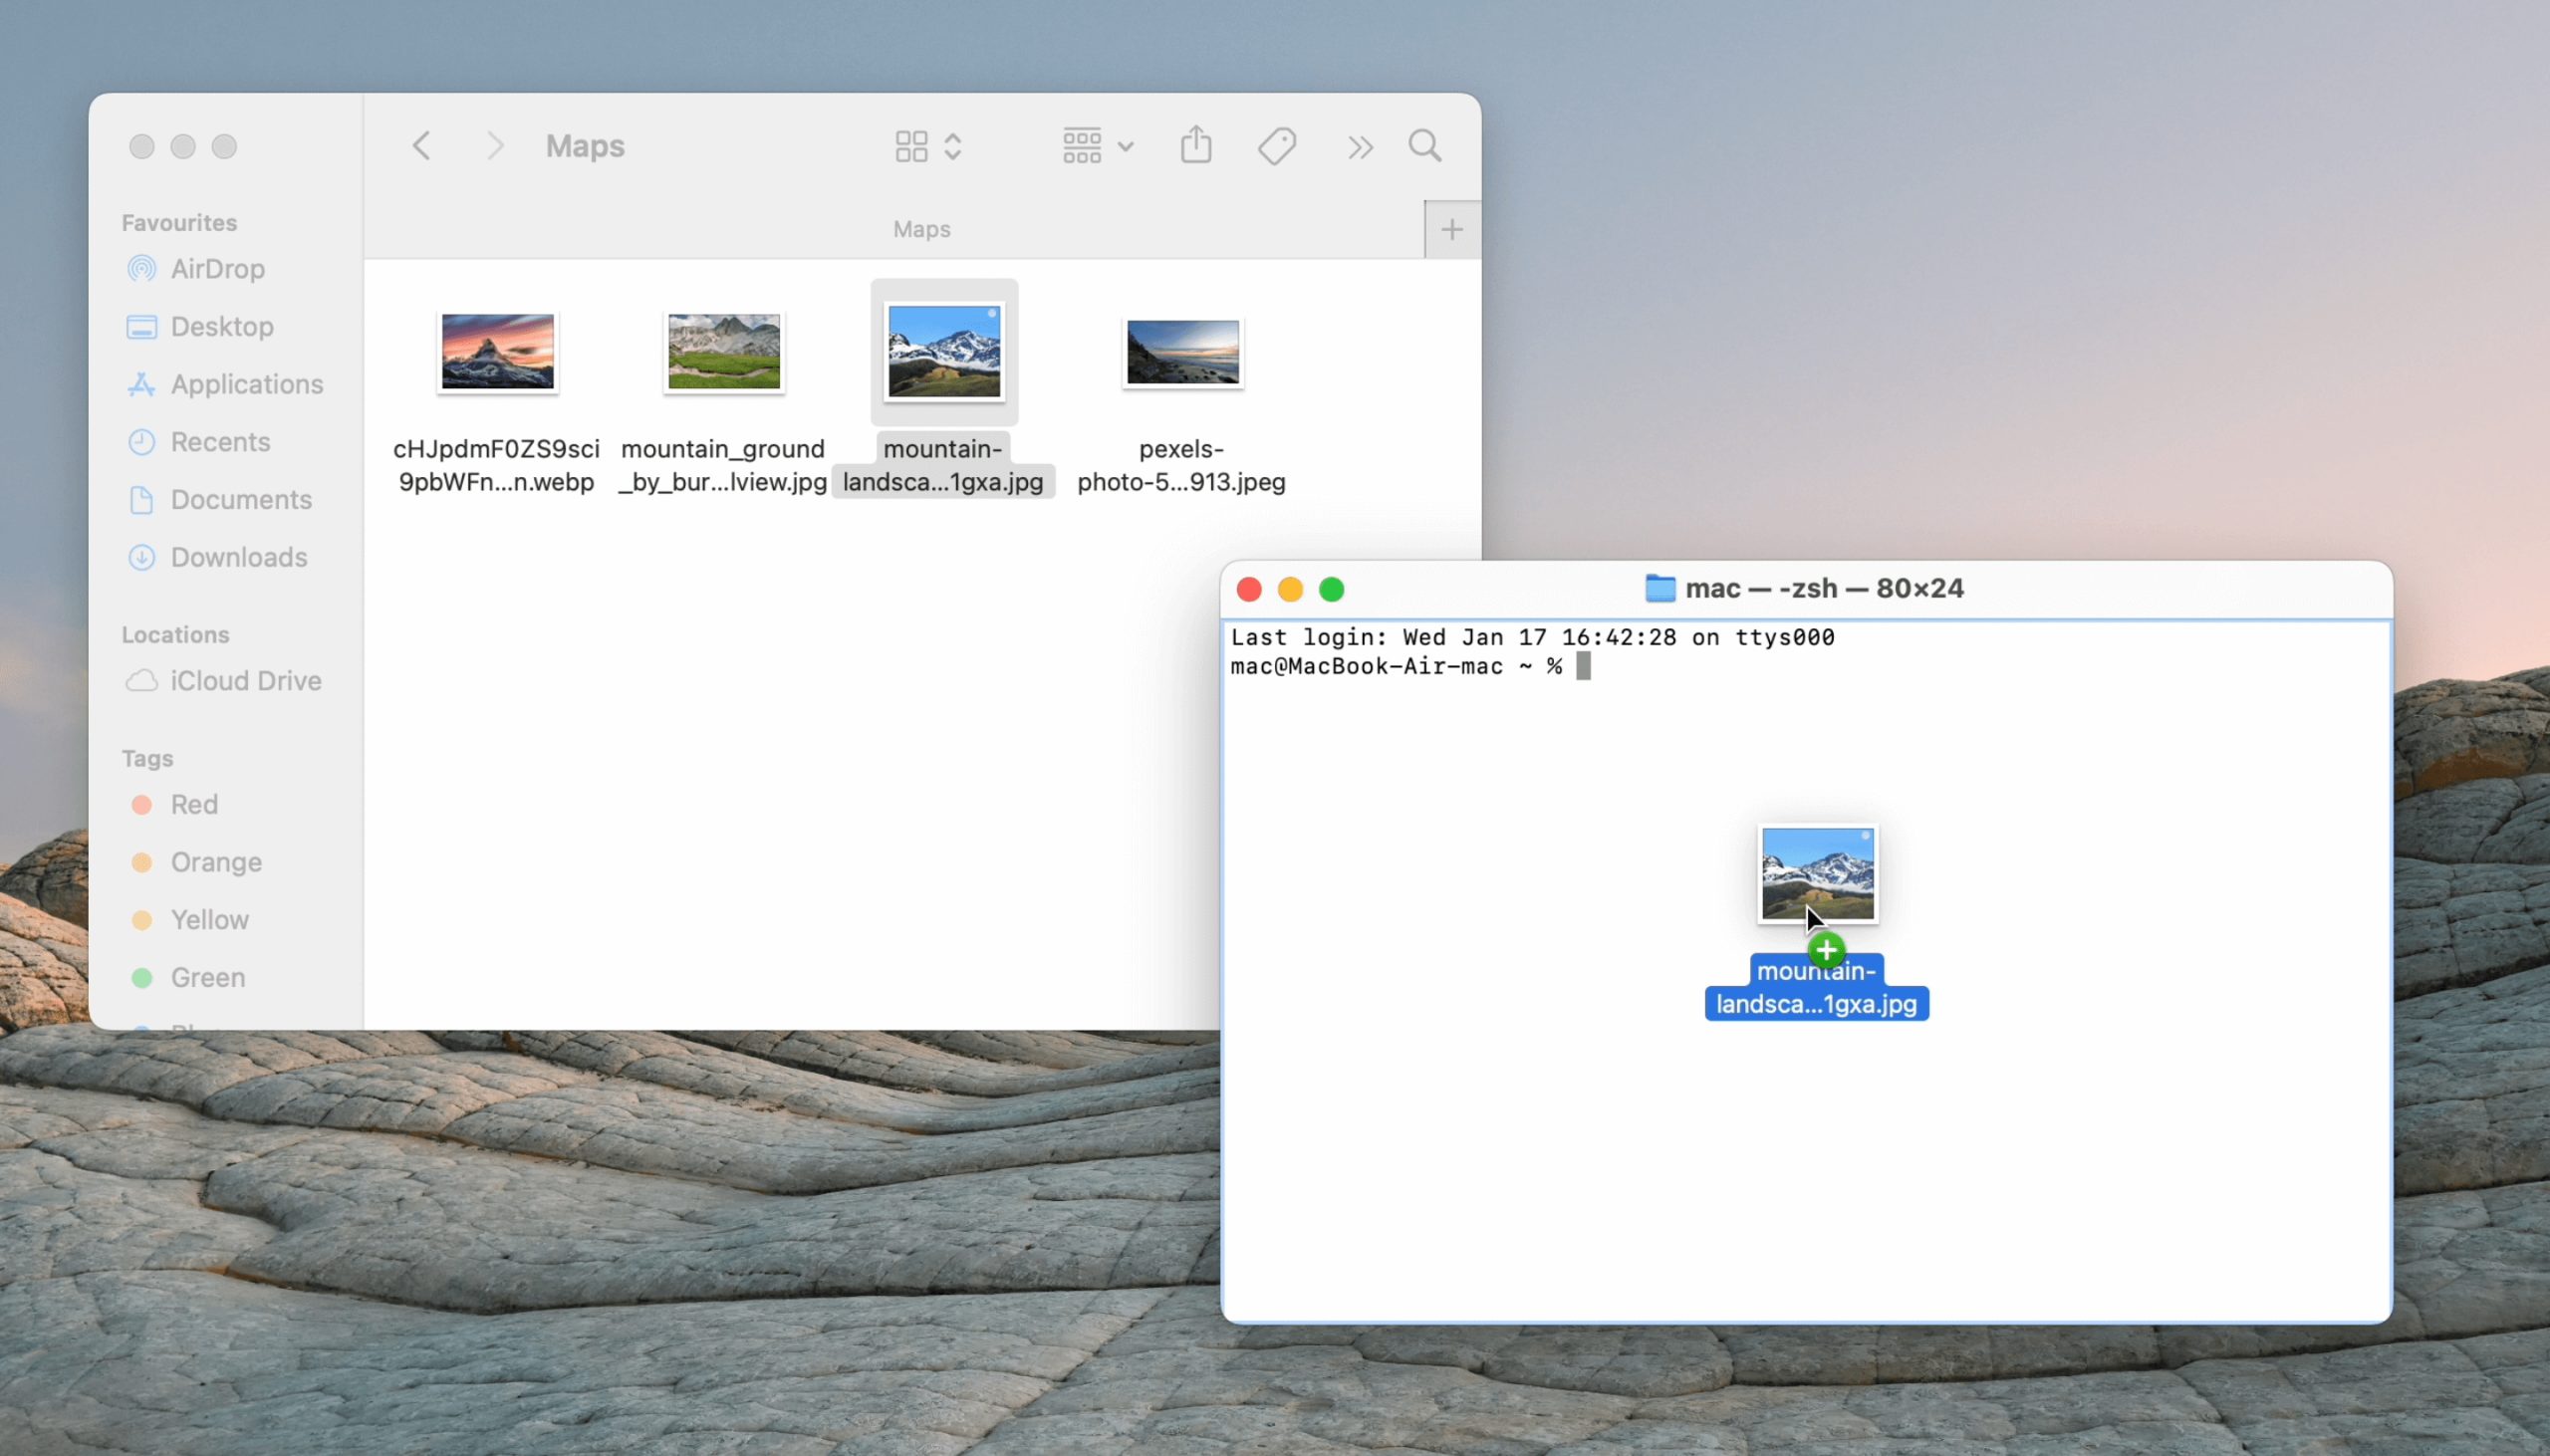
4. You will see the path to the element appear in the command input line.

5. You can immediately select and copy it.
How to find path of a file on Mac with Commander One
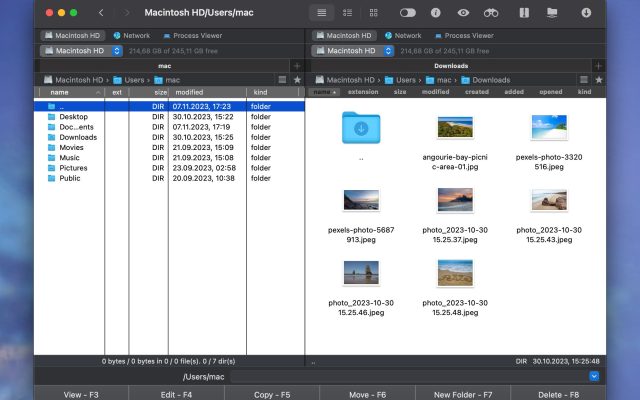
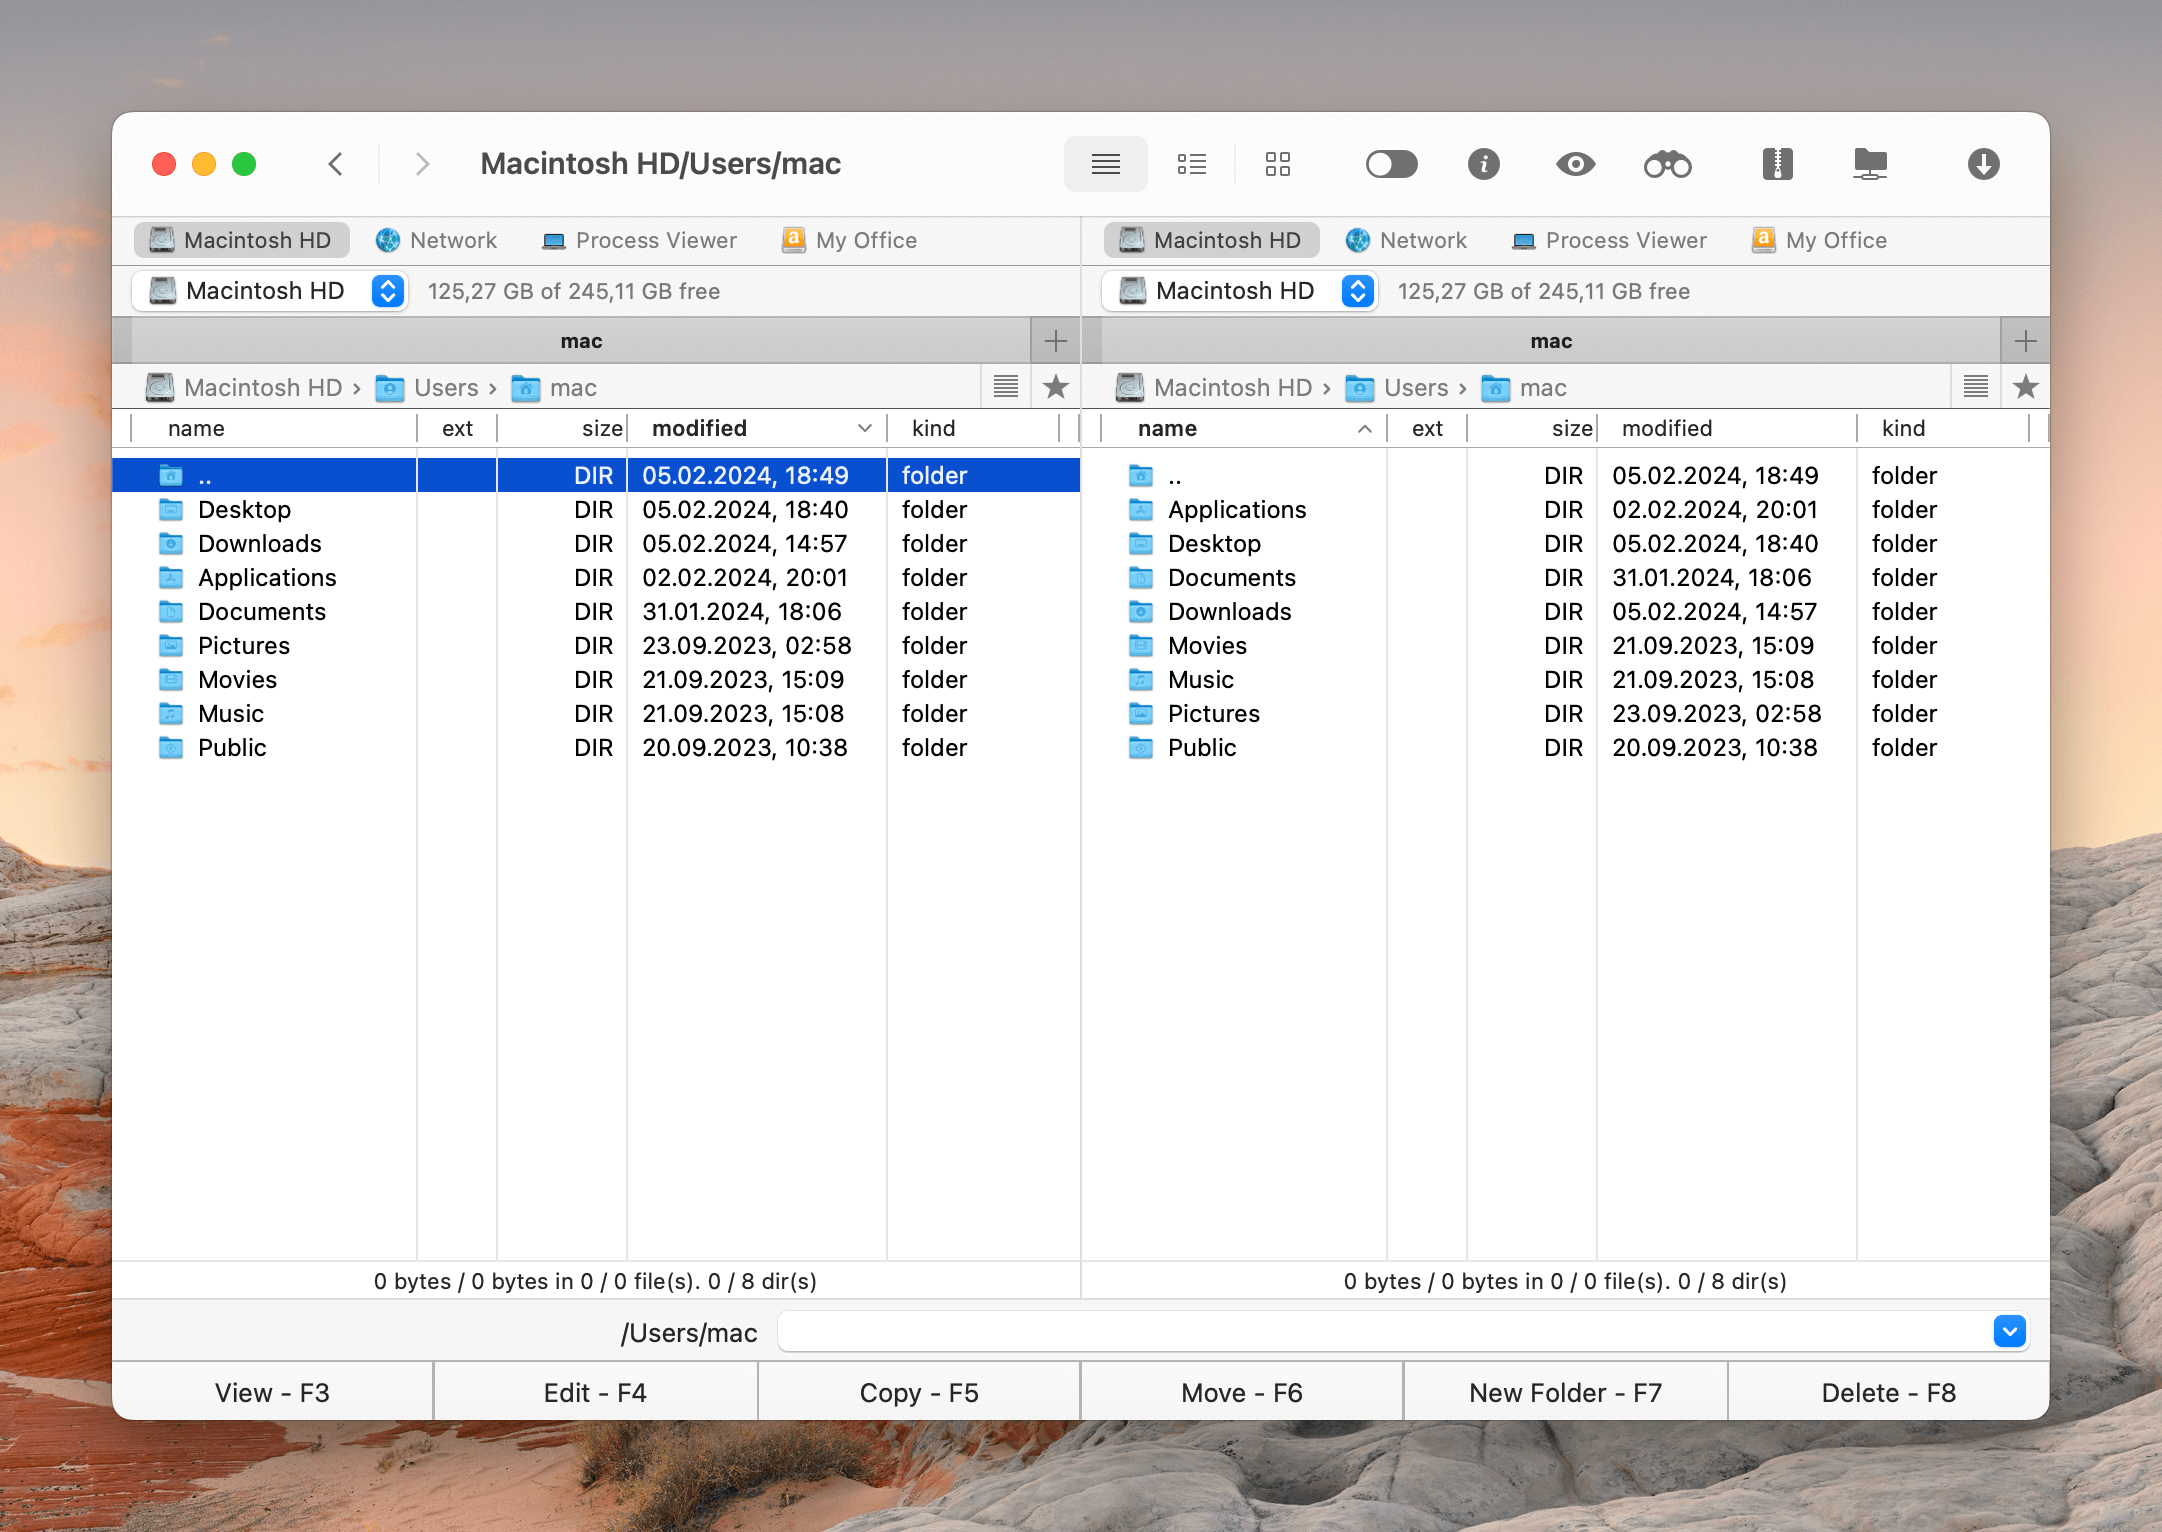
When it comes to finding the path to a file, Commander One provides a convenient way to quickly and accurately find the desired directory. Whether the file is located deep in the system or on an external storage device, the app will show you the path to it within a couple of seconds.
Being a convenient file manager for macOS you can easily manage files, copy and move between different locations, and much more. The app offers advanced search functions, built-in archive support, data encryption, and the ability to connect to cloud storages like Google Drive, Amazon S3, Dropbox, OneDrive, etc., and web services like FTP, SFTP, FTPS, and FTPES for efficient file management on your Mac.
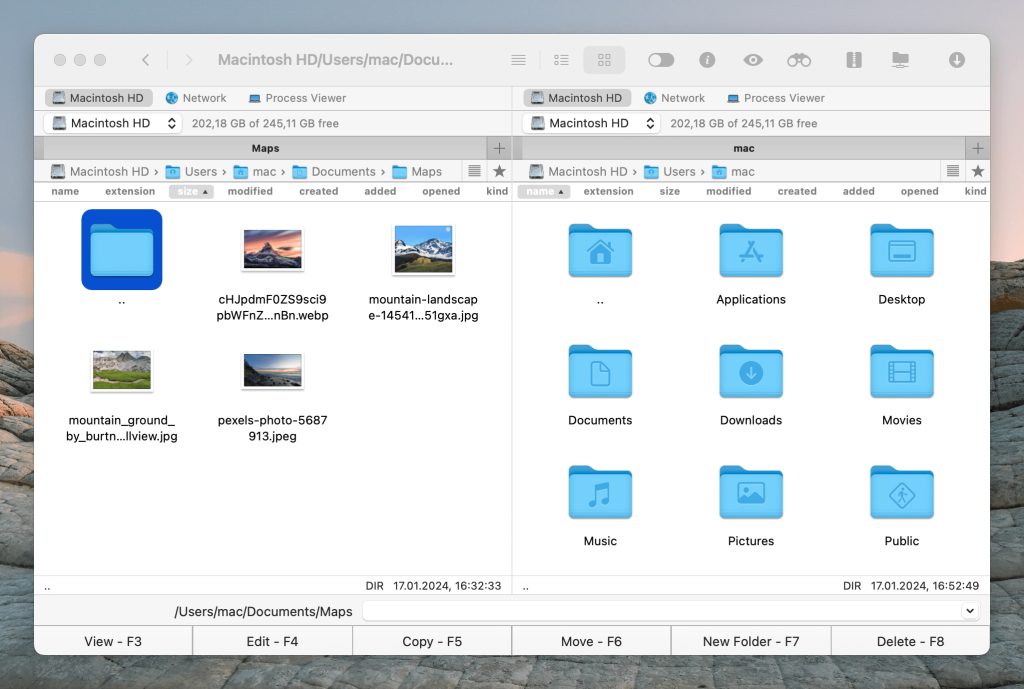
Additionally, it is worth mentioning the app’s ability to integrate with iOS, Android, and MTP devices. You can easily manage, edit, create, delete files and transfer the content on your devices right from the Commander One interface.
Overall, the app provides a complete range of tools for managing files on Mac, suitable for both newbies and those who need advanced data management features.
To get file path Mac users need to proceed with the following steps:
1. Download and install Commander One on your Mac.
2. After installation, run the app.
3. Select the file you want to know the path to and choose one out of two variants to know the path:
- click the “Get Info” toolbar button.
- press the Command + I hotkeys.
- Alt + Command + I to invoke the Get Finder Info window.

How to find other hidden files on Mac?
Along with the ability to show path to regular files and folders, Commander One also supports the ability to show hidden files on Mac in a fast and convenient way. Proceed with the guide below in order to view the file path on Mac for hidden files.
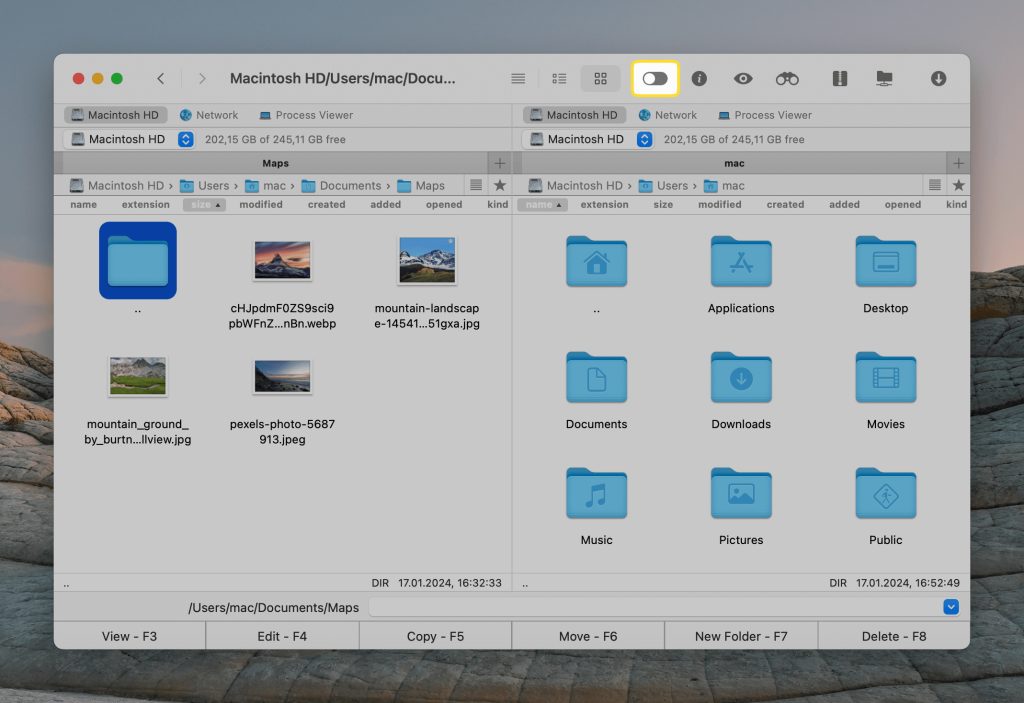
1. Launch Commander One and reveal hidden files by choosing one out of three variants:
- click the corresponding button on the toolbar;
- use the “Show Hidden Files” option in the menu
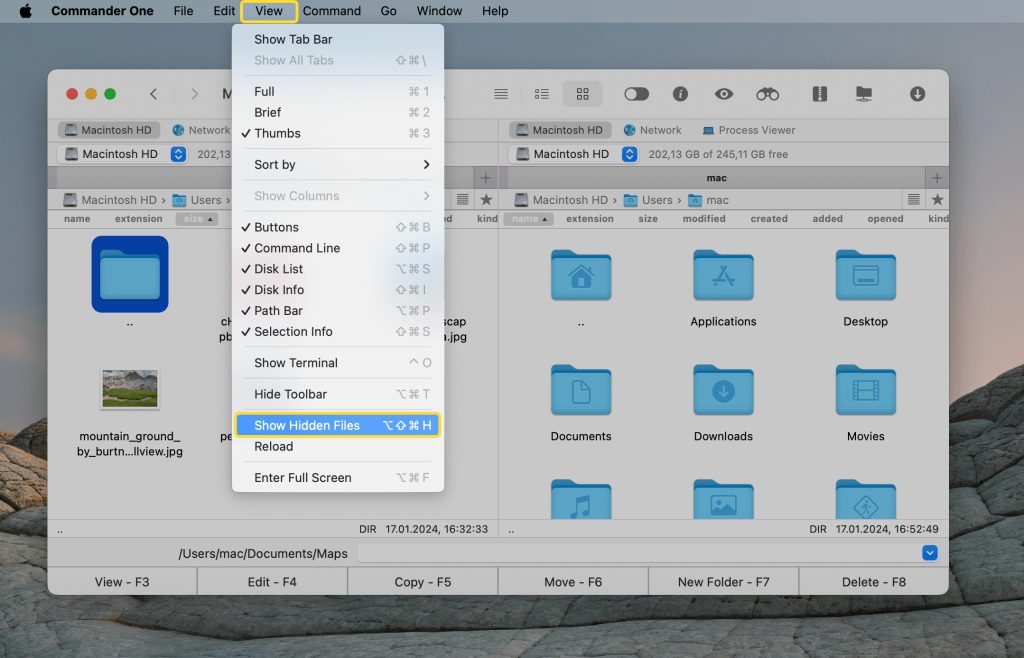
- use the Option + Shift + Command + H shortcut.
2. Once they are revealed, you can navigate to the necessary file and proceed with the steps of finding file path on Mac described in the guide above.
How to copy the file path using Commander One
To copy path of a file in Mac via Commander One, read the instructions below:
1. Launch Commander One and select the desired file.
2. Navigate to Edit – > Copy Path to Clipboard.
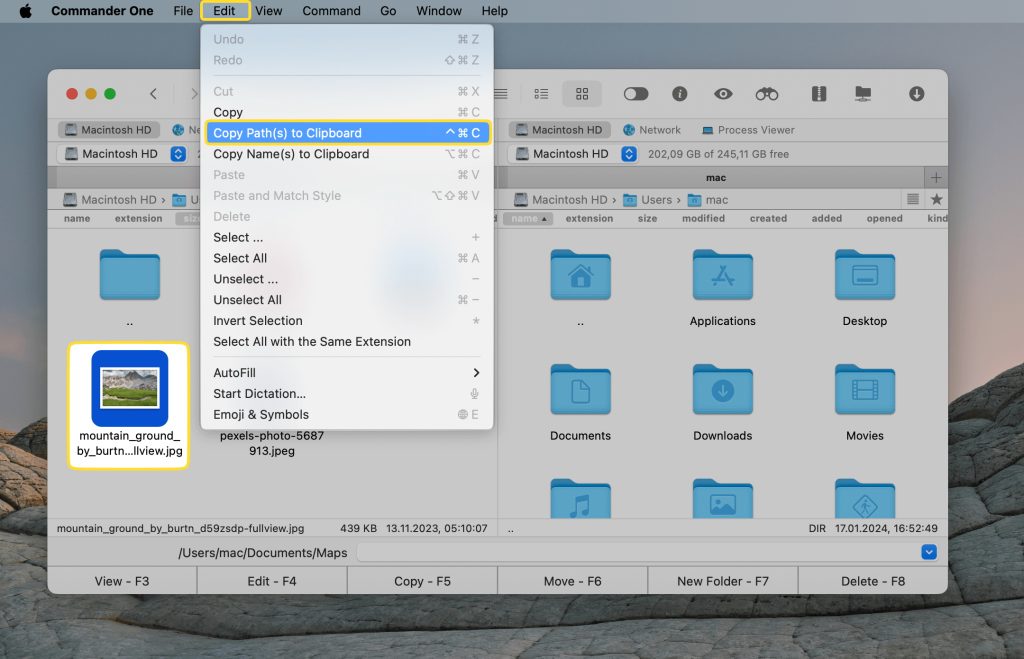
3. Alternatively, you can click the “Get Info” toolbar button and copy the path from the invoked window under the “Where” section.
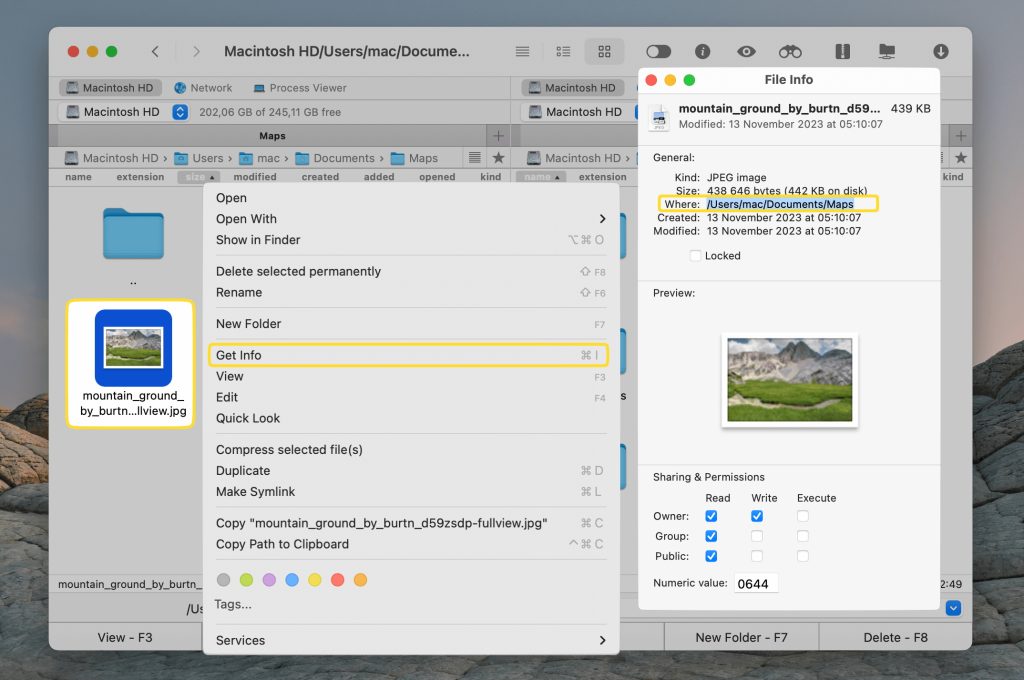
How to get path of a file in Mac using Get Info
Another quick variant of finding file path on Mac is by using the “Get Info” option. For this, follow the steps below:
1. Open Finder.
2. Locate the desired file and right-click it.
3. From the context menu, choose the “Get Info” option.
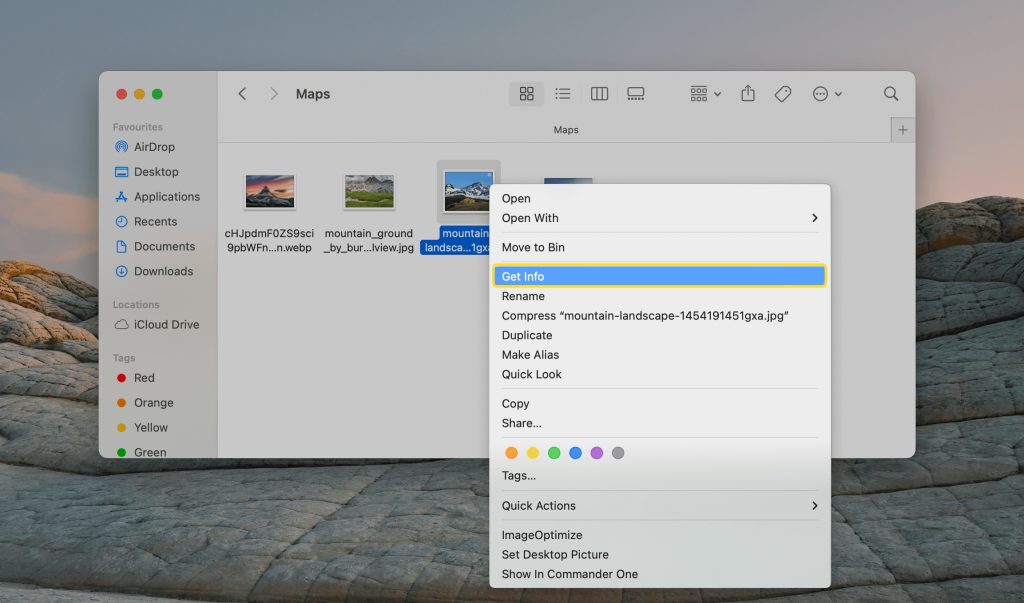
4. A window with detailed information about the file will appear.
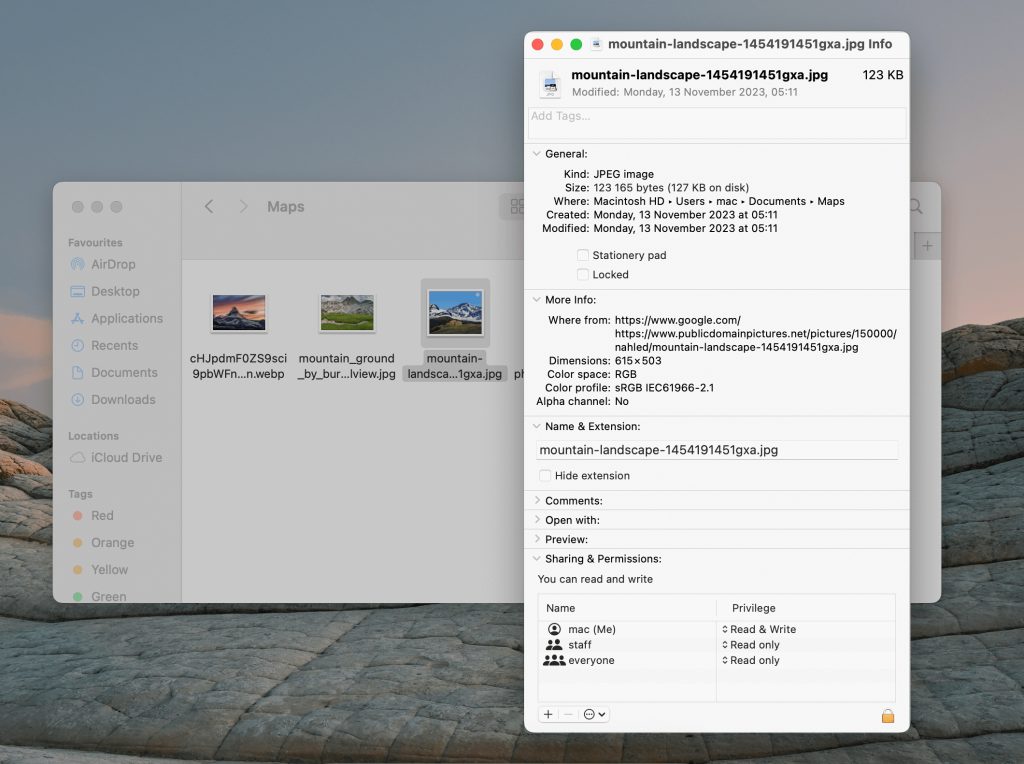
5. Navigate to the “Where” section to see information about the path to the file.
6. If you need to copy the file path:
- Select it and use the key combinations Command + C/Command +V.
- Right-click it and select the “Copy as Pathname” option.
How to Show file path in Mac via Context menu
The next way of showing the file path is not so obvious, and not all users are familiar with it. To know how it works. So to copy path of a file in Mac you should proceed with the next steps:
- Open Finder.
- Find the desired file or folder and right-click it.
- A context menu will appear.
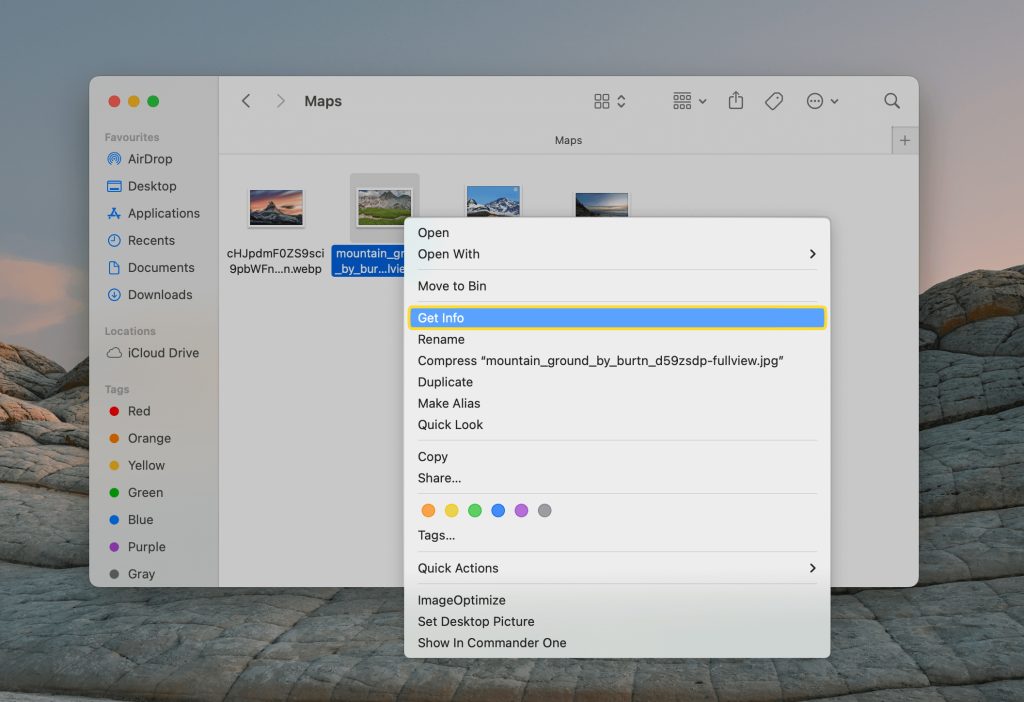
4. Without closing the context menu, press and hold the Option (Alt) key.
5. The new items will appear in the context menu.
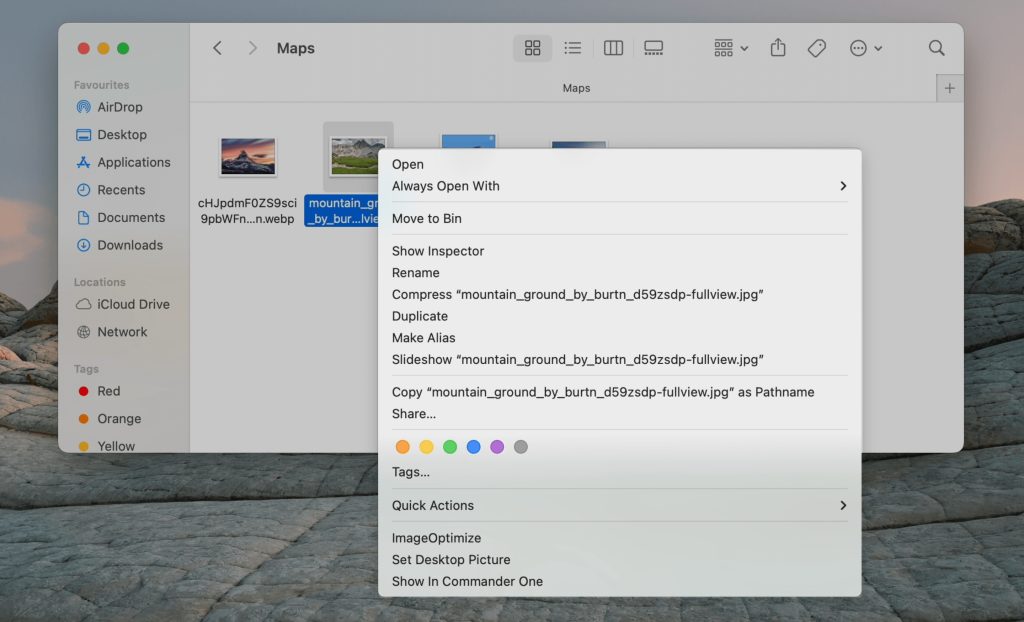
6. Select the “Copy “folder” as Pathname” option.
7. That’s it. Now you can paste it anywhere you need.
Get path of a file using Go to Folder
To view file path Mac users can also resort to one more way. For this:
1.Open Finder.
2. Select Go – > Go to Folder from the menu bar.
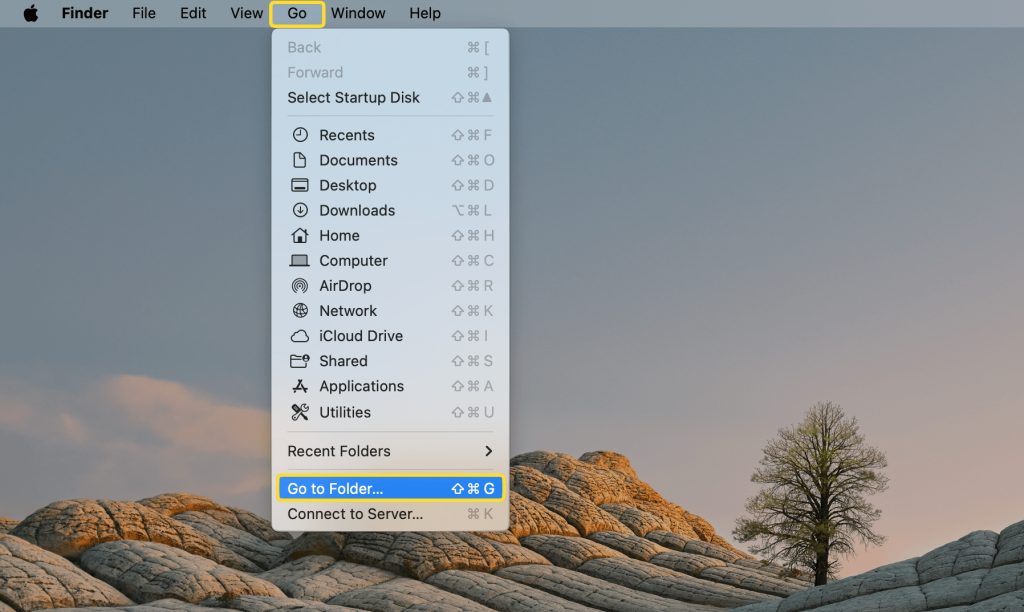
3. A small window will appear.
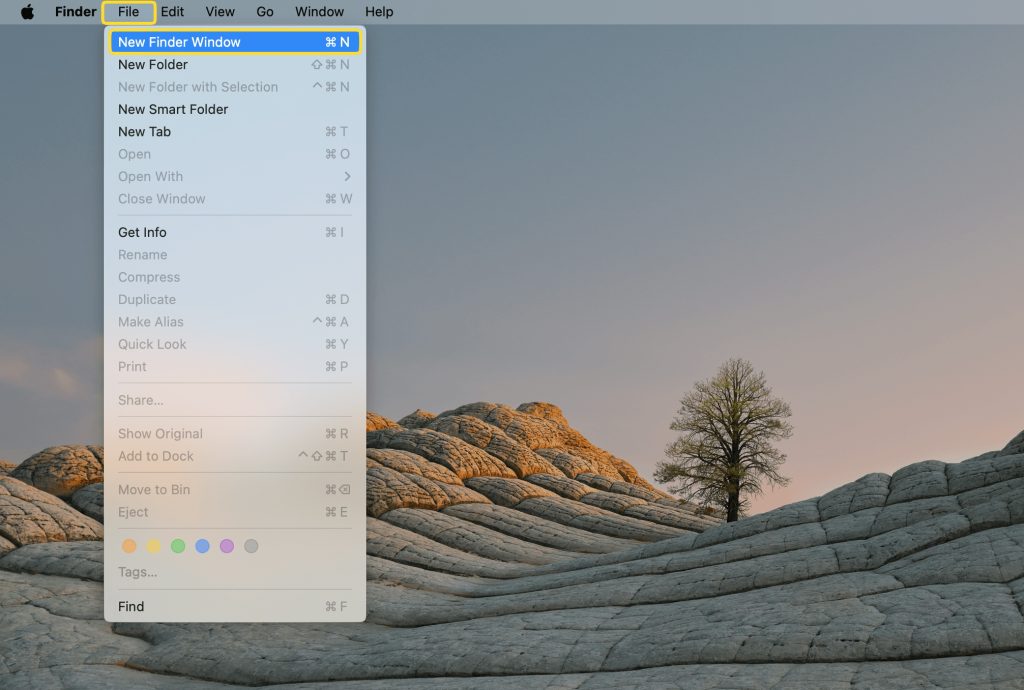
4. Open a new Finder window. For this:
- click Finder’s icon in the Dock
- select File – > New Finder Window from the menu bar
5. Find the file you want to know the full path to.
6. Drag and drop the file into the search bar of that small window.
7. Wait for the path to appear below in the “Go to” section.
Conclusion
Finding out the full path to a file is not so difficult. We have offered you several ways to effortlessly finding file path on Mac via the standard macOS tools as well as a third-party app, namely Commander One. For users seeking a comprehensive solution with advanced functionality and a range of unique features that are missing in Finder, Commander One stands out as the best choice.
With its help, you can seamlessly find file path on Mac as well as connect to Android, iOS, and MTP devices, as well as the most popular cloud storages and web services, and many more.ent section below.


