- Mount cloud storage as local drive on Mac
- Mount FTP as a Drive on Windows
Mount FTP as a Drive on Windows

If you want to mount FTP as drive on Windows, the built-in method is quite easy to use. However, sometimes basic functionality isn’t enough, and Windows users might want more features and better data protection.
That’s where CloudMounter comes in. Below, we explain how you can use this app to map FTP as a drive on Windows. We also explain how the native method works so you can decide which is better for yourself.
Native method of mapping FTP as a network drive
While Windows makes it easy to mount an FTP server on its file manager, you can’t connect to FTPS or the more modern FTPES.
Here’s how you can mount an FTP server as a local disk on the latest version of Windows:
- Go to File Explorer > This PC > Add a network location.
- Then click on Next and select Choose a custom network location.
- Type in the FTP address (e.g., ftp://ftp.microsoft.com).
- Enter the username or check Log on anonymously. Type a network location name and then click on Finish.
Once you’re done, you’ll see the shortcut to the FTP server in the file manager.
If you need better security, want to work with FTPS (FTP with implicit SSL) or FTPES (FTP with explicit TLS/SSL), or require more than just uploading and downloading between the remote server and Windows, we’ve discussed a few third-party alternatives below.
Alternative tools for managing FTP files as if they were stored locally
Here are some third-party solutions you can use to mount FTP as a Windows drive:
- NetDrive – a flexible tool, but it doesn’t support AES 256-bit encryption.
- RailDrive – offers both GUI and CLI versions, works on Windows and Linux, but requires creating an account.
- Air Live Drive – has a somewhat confusing interface and lacks strong encryption.
Finding the right software can be challenging. Fortunately, this list isn’t exhaustive, and we’ve discussed another important alternative below.
How to add an FTP server to File Explorer via CloudMounter
If you want to manage your FTP data through File Explorer like local files, we recommend trying the CloudMounter desktop app. It’s more user-friendly and intuitive than the native solution, and you can also use it to work with other remote servers and cloud storage services. Here’s how to use it:
1. Download and install CloudMounter on your PC.
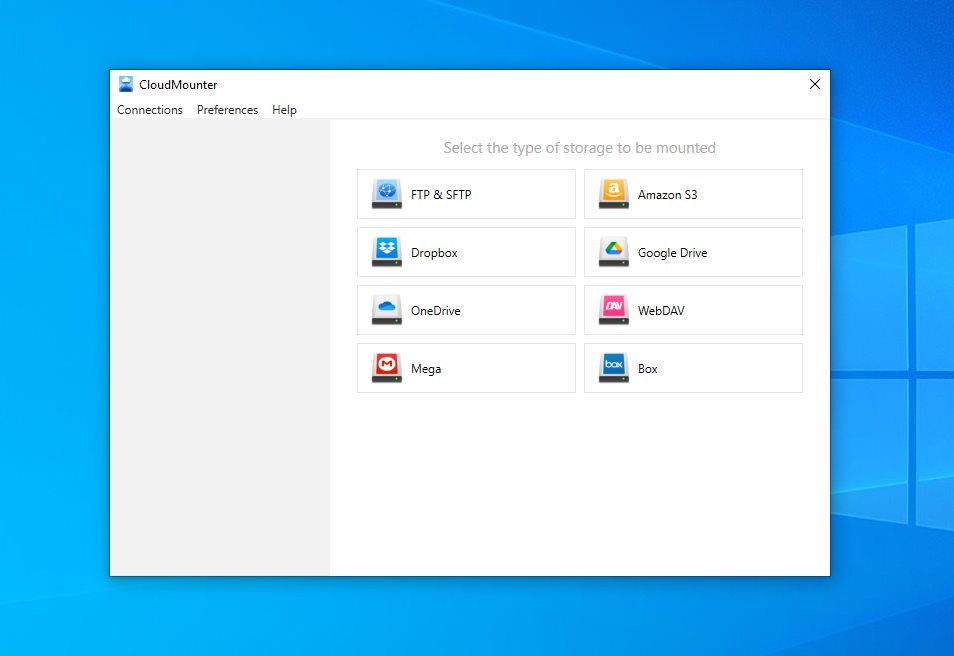
2. Launch the app and select “FTP & SFTP” as the type of storage.

3. Enter the following details:
- Connection name and type.
- Server address and port (usually 21 for FTP).
- Username and password (or log in anonymously).
- This is optional, but you can also limit the number of simultaneous connections.
- Choose between active or passive mode.
- Remote path (the folder on the server you want to connect to).
4. Pick a drive letter and then click on “Mount”.

You should now be able to see FTP in File Explorer, and you can start managing your remote files.

Advanced uses for CloudMounter you should know
CloudMounter does much more than just letting you map FTP as a network drive on Windows. Here are some other features we recommend exploring:
- Centralized file management for all your storage.
- Supports unlimited online storage accounts.
- Works with various cloud services, SFTP, and WebDAV servers.
- Client-side AES-256 encryption for enhanced file security.
- Available for both Windows and Mac.
Conclusion
You can mount an FTP server on Windows using the native method, but keep in mind it won’t let you connect to FTPS or FTPES. It’s a very barebones approach, so you won’t get the advanced functionality offered by third-party alternatives.
One alternative we recommend trying is CloudMounter. With this tool, you can mount other remote servers and cloud storage services as well. It also provides stronger data security and improved file management.