How to Clear Up Disc Space on Mac Quickly

No matter how much disk space your Mac has, active users will eventually run out of room over time. Whether your shared files are too large or you have unnecessary duplicates, there are several methods you can use to free up space on your Mac.
Before trying anything, we recommend using native methods. However, in this article, we’ll also look at CloudMounter, an excellent third-party alternative.

Way 1. Remove unused items from your local disk

Freeing up space on your MacBook starts with the most straightforward method – removing old or unused files and applications. Deciding what to delete, though, can sometimes feel a bit overwhelming.

Follow the steps below to quickly learn how to identify and remove unnecessary items to reclaim your valuable disk space:

1. Filter by file size: Larger files often consume the most space, so filtering and targeting these first will quickly clean up disk space on Mac. This includes old videos, bulky downloads, or previous backup files that you no longer need.

2. Sort by date: Old and forgotten items can often crop up when you sort your data out by date. Start with the oldest ones in your system, as these are more likely to be irrelevant or unused.

3. Clear browser cache: Browsers accumulate massive data over time in the form of cached files. Once you clear this cache, you’ll save space while boosting the browser’s performance. 

4. Tidy up the downloads folder: Regularly reviewing and deleting items from the “Downloads” folder can help eliminate files that you no longer need.

5. Empty the trash: Get into the habit of emptying the Trash regularly, or set it to clear automatically every 30 days to remove unnecessary items permanently.

6. Stream media instead of storing it: Media files, such as movies, music, or podcasts, can take up considerable space. Delete local copies of files you can easily stream or redownload when you need them.

7. Uninstall unused applications: Remove applications that take up valuable space but are rarely, if ever, used. 

8. Delete screenshots: Screenshots often pile up unnoticed on your Desktop by default. Clearing them regularly can help reduce unnecessary clutter.

These steps can prevent your storage from becoming overwhelmed and improve your laptop’s performance significantly.

Way 2. Check the “Users” folder on your Macintosh HD

Navigate to your “Users” folder on Macintosh HD to find undeleted data from accounts you may have removed. When you delete a user account, some data, such as documents or files, can linger in this directory.

Similarly, shared files often tend to accumulate overtime, especially if you’ve used your computer for collaboration or transferring files between users. Clearing out these remnants can help free up storage space.

Users folder on Macintosh HD

Way 3. Organize your file system

Adopting an effective system to organize and manage your files can help empty disk space on Mac as well. All it takes is picking up a few smart habits and making small tweaks. This can take the form of creating a well-structured folder system with a consistent file-naming convention, for example. Not only is this important for locating important files but it can also help reduce the accumulation of redundant data.

Way 4. Clear out space with a cloud storage manager

A more efficient and effective way to clear space on Mac is to use a cloud storage manager like CloudMounter. This app allows you to access multiple storage platforms, like Google Drive, Amazon, or Dropbox simultaneously through a single desktop app. This allows you to work with your data from anywhere in the world with an Internet connection.

Unlike external drives that can be lost or damaged, cloud services free up space without compromising your security. CloudMounter is one of the best tools on the market for this job.

How to empty storage via CloudMounter

While native methods are effective when you need to delete files on Mac to free up space, they can be time-consuming and require manual effort. That’s where CloudMounter comes in to simplify your storage management by connecting your Mac to multiple cloud platforms at once. Here’s how that works: 

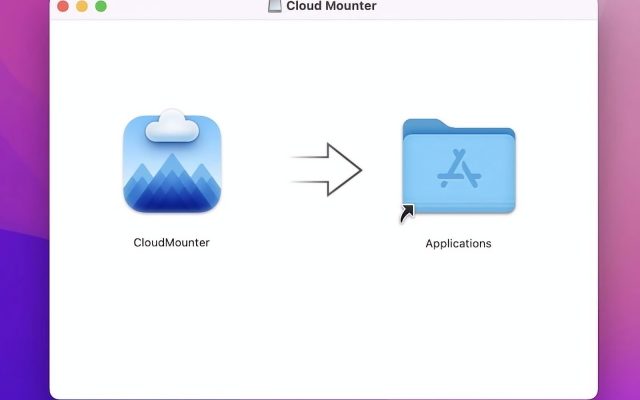
1. Download and install the desktop app on your MacBook.

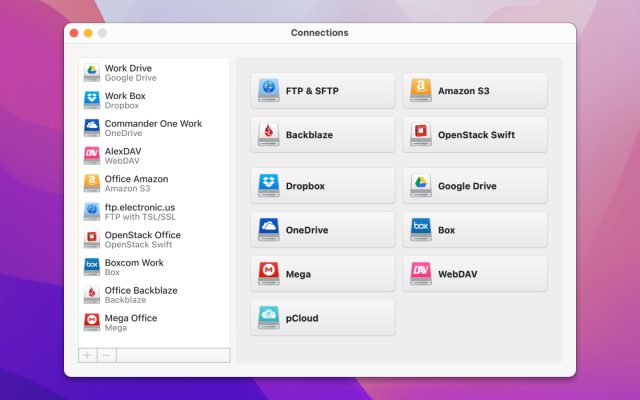
2. Launch the app and select the storage you need.

Selecting the storage icon in CloudMounter on Mac

3. Log in with your credentials and connect the accounts you want.

4. Hit the “Mount” button to mount these as local drives on your Mac.

5. Access your files through Finder. 

You can choose to drag and drop unnecessary items from your local disk to the cloud storage of your choice or distribute them across your accounts. The files uploaded to cloud storage do not take up disk space. You can also open them directly on the mounted disk, such as OneDrive or Google Drive, without downloading them to your local storage.

That’s just the beginning of what CloudMounter can do. We’ll now share some other fascinating features you’ll be excited to know about.

Why else is CloudMounter intriguing

It is worth paying attention to the following equally important features of this desktop app:

  • Extensive compatibility: The desktop app works seamlessly with platforms like Google Drive, Dropbox, OneDrive, Amazon S3, pCloud, Box, Backblaze, Mega, and OpenStack.
  • Centralized management: It lets you manage all your cloud data from one place so that you can move around items and free up local storage easily.
  • Better security: This app also offers client-side encryption to safeguard your online files.
  • Remote server support: It enables file management for remote servers, such as FTP, SFTP, and WebDAV servers.

Conclusion

Every Mac user runs into storage issues at one point or the other during their life. What matters is how you handle it, whether with native tools or third-party apps like CloudMounter. Native methods include getting rid of unused or duplicate files, checking the user folder, or coming up with an organized file-management system.

CloudMounter, on the other hand, is a great alternative that offers extensive features and solid compatibility with various interfaces. It’s a must-have for any Mac user who wants to optimize their storage.