Mount Amazon S3 Bucket on Windows

thumbnail

There’s nothing more important than having easy access to cloud storage in today’s data-driven world. Amazon S3 is one of the best options out there, but integrating it into Windows can be a bit challenging for those unfamiliar with the Management Console, AWS CLI, or other S3 tools.

However, there are ways to mount S3 bucket on Windows, allowing you to access and manage your data directly within Windows’ interface. Below, we explain how to do exactly that with the help of an app called CloudMounter.

Is it possible to map an S3 bucket as a native Windows drive?

Directly mapping Amazon S3 as a network drive on Windows requires third-party S3 browsers due to its own lack of native S3 protocol support.

The good news is that most third-party apps offer multiple features that make it easy to integrate Amazon S3 into Windows, even for newcomers. Plus, you only need one app, as these tools are usually capable of connecting to multiple cloud storage services.

How to add AWS S3 to File Explorer with CloudMounter

CloudMounter is one such third-party tool that lets you access your S3 bucket directly in File Explorer without having to download your files or switch between multiple apps. It’s compatible with all AWS regions and various S3-based storage solutions.

Here’s how to mount Amazon S3 bucket as a Windows drive:

1. Download CloudMounter for Windows from the official website and install it on your PC.

Download and install CloudMounter on Windows

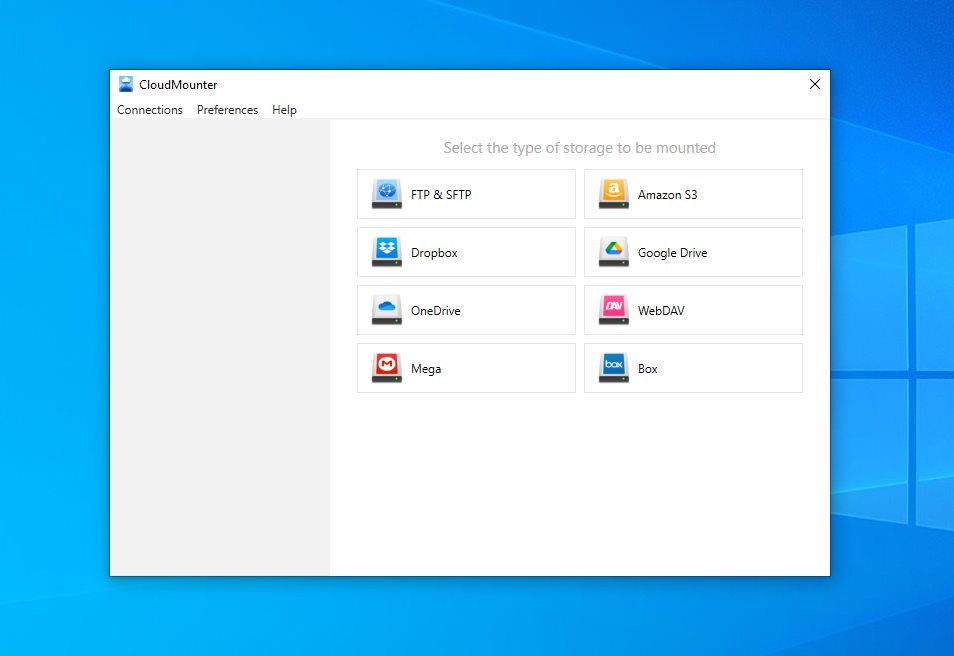
2. Run this desktop app and choose “Amazon S3” in the connection dialog.

Select Amazon S3 connection in CloudMounter on Windows

3. Enter the connection name, then type in your Access Key and Secret Key into the corresponding fields.

Note: You’ll need AWS credentials to mount your S3 bucket. These can be found in the AWS Management Console under Identity and Access Management (IAM).

4. Enter the Server Endpoint for S3-compatible cloud storage services such as Wasabi, S3For, Hyperstore, Minio, and more.

Amazon S3 setting in CloudMounter on Windows

5. Select the bucket name from the dropdown menu. Alternatively, use / to mount all buckets as subfolders in the drive’s root. The region will be detected automatically.

6. Choose a drive letter and click on “Mount”.

Once connected, your S3 bucket will appear in File Explorer automatically, and you can start accessing, managing, and transferring your files just like any local drive.

Access Amazon S3 server from File Explorer

Boost your productivity with CloudMounter

Mounting S3 bucket on Windows isn’t the only thing you can do with CloudMounter. Here are some other features this app offers:

  • Allows simultaneous access to multiple AWS accounts and S3 buckets.
  • Manage all your cloud storage from one place without needing extra applications.
  • Passwords are securely stored in Windows Credential Manager and sent via encrypted channels.
  • Works on both Windows and macOS.
  • Supports a wide range of popular cloud services as well as FTP, SFTP, and WebDAV servers.
  • Client-side encryption keeps your data safe from unauthorized access.


Our developers are constantly improving CloudMounter by adding new features, refining existing tools, expanding compatibility, and updating security to provide a reliable and user-friendly experience.

Conclusion

While there’s no native support to map an S3 bucket as a drive on Windows, you can use third-party apps like CloudMounter to connect your storage and access files directly from File Explorer. It makes it easy to access your files directly on your Windows PC, and you can use it to connect to other cloud storage services as well.