Access WebDAV and Google Drive: File Management Manual

This article describes the safest and most efficient ways to transfer files from Google Drive to WebDAV and the other way around.

Since WebDAV doesn’t directly connect to Google Drive, you have to manually download your files from the respective service or use third-party bridge software to link Google Drive and WebDAV.

One such option is CloudMounter, a simple and user-friendly tool that facilitates file movement between various platforms.

Transfer WebDAV files to Google Drive or vice versa by downloading

With this method, the user downloads their files locally to their computer and then uploads them to another storage service.

Move data from Google Drive to WebDAV

  1. Log into your Gmail account and click the Google apps icon in the upper-right corner. Tap “Drive” to view all files on Google Drive.
  2. Select the files and folders you wish to transfer and click the Download icon at the top. Alternatively, you can right-click on the files/folders and choose “Download”.

    Download files from Google Drive

  3. The files will be downloaded as a zip folder. Unzip them on your desktop.
  4. Connect to the WebDAV server using your file manager:
    a. Windows: open File Explorer, go to “This PC” > “Add a network location”. Enter the WebDAV server URL and log in;
    b. macOS: in Finder, click “Go” and select “Connect to Server”. Enter the WebDAV URL and your credentials.
  5. After a connection is created, you can use your file manager to upload, download, and edit files. To share a file, just copy it to the WebDAV folder. Those with the necessary permissions will be able to access or edit the file.
Note: If you regularly rely on WebDAV, you need to mount it manually every time in Finder, although some WebDAV clients do this automatically. In addition, if you have generated an HTTPS certificate, you have to click “Allow” in Finder every time. To avoid any hassle and fully manage and use files from a remote server on your Mac, explore a third-party option, such as CloudMounter.

How to connect and transfer files to WebDAV from Mac

Migrate WebDAV data to Google Drive

To move files from WebDAV to Google Drive, follow these steps:

  1. Use your file manager to connect to the WebDAV server.
    a. Windows: launch File Explorer, then click on “This PC” > “Add a network location”. Type in the WebDAV server URL and log in.
    b. macOS: open Finder and click “Go”, then pick “Connect to Server”. Enter the WebDAV URL and your details.
  2. Download your files to the local hard drive.
  3. Upload the files to Google Drive by going to https://drive.google.com/ in your preferred web browser and logging in. Then, click on the “+ New” icon > “File Upload” and select your desired files.
Upload files or folders to Google Drive
Note:  Before you start, ensure that your local hard disk has sufficient space for the downloaded WebDAV files.

This method can be cumbersome since it takes a lot of time and requires you to switch between browser tabs and apps.

The easiest file management between Google Drive and WebDAV

How about a more straightforward way to move files between Google Drive and WebDAV? CloudMounter, an all-in-one cloud storage manager, lets you mount WebDAV as a network drive. As a result, you can easily manage your files without wasting any time and effort.

How to transfer from Google Drive to WebDAV with CloudMounter

Here is how to migrate from Google Drive to WebDAV in a few simple steps:

1. Download the desktop app for macOS or Windows and install it on your machine.

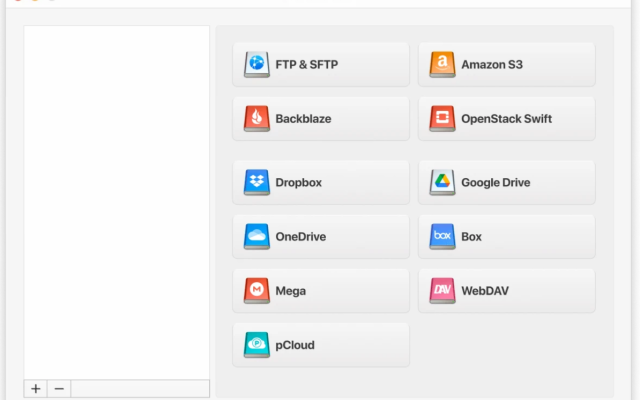
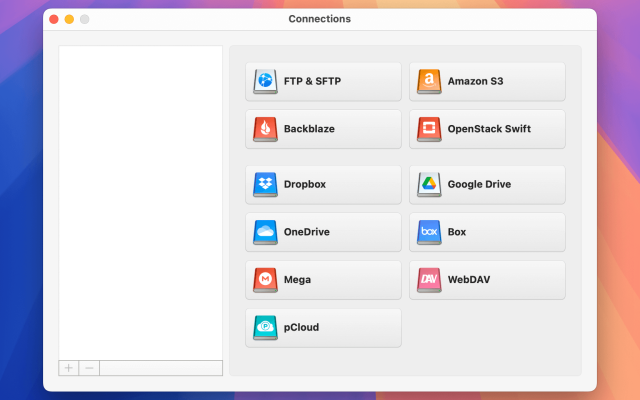
2. Open the application and in the “Connections” dialogue box, then choose one by one Google Drive and WebDAV.

Selecting of connections in CloudMounter on Mac

Connect Google Drive and WebDAV in CloudMounter on Windows

3. Fill in the required details for each connection in the respective fields.

4. Press “Mount” to map your storage as network drives.

5. You will see each storage service in your file manager.

6. You can now copy and paste your files as you normally would local folders using Finder or File Explorer.

Cloud storage mapped as local drives on CloudMounter

Explore this tool and learn about all it can do for you.

Additional CloudMounter features

This software makes using multiple accounts from different storage providers or remote servers easy. Its benefits include features like:

  • Overseeing all your server files in one place
  • Encrypting your online files to improve safety
  • Using the tool on both macOS and Windows
  • Working offline with files on macOS, you’re not dependent on the internet connection

The program has an additional array of handy features, for example:

  • Offers a wide range of cloud storage and web services
  • Allows as many cloud accounts as needed
  • Supports file management for remote servers such as FTP or SFTP
Note:  Don’t forget to verify that your hard drive has sufficient free space for a temporary copy of the files from your cloud storage or remote server. For online documents such as Google Docs or Sheets, the tool only saves links that can be moved between folders as small files. Such documents cannot be opened as local files after copying. And if you move them from cloud storage to a local disk, they will also disappear from Google Drive.

Conclusion

As you learned above, when it comes to transferring your files from WebDAV to Google Drive and vice versa, there are several methods available, each with a different level of convenience. The more time-consuming method involves manually downloading and uploading your files, while the simpler way uses third-party solutions like CloudMounter to directly access your cloud storage as if it were a local folder. Such versatile apps also offer additional benefits to make such migrations even easier.