- Video Player for Mac
- Video Player with Subtitles: Add Subtitles to Videos and Movies on Mac
Video Player with Subtitles: Add Subtitles to Videos and Movies on Mac
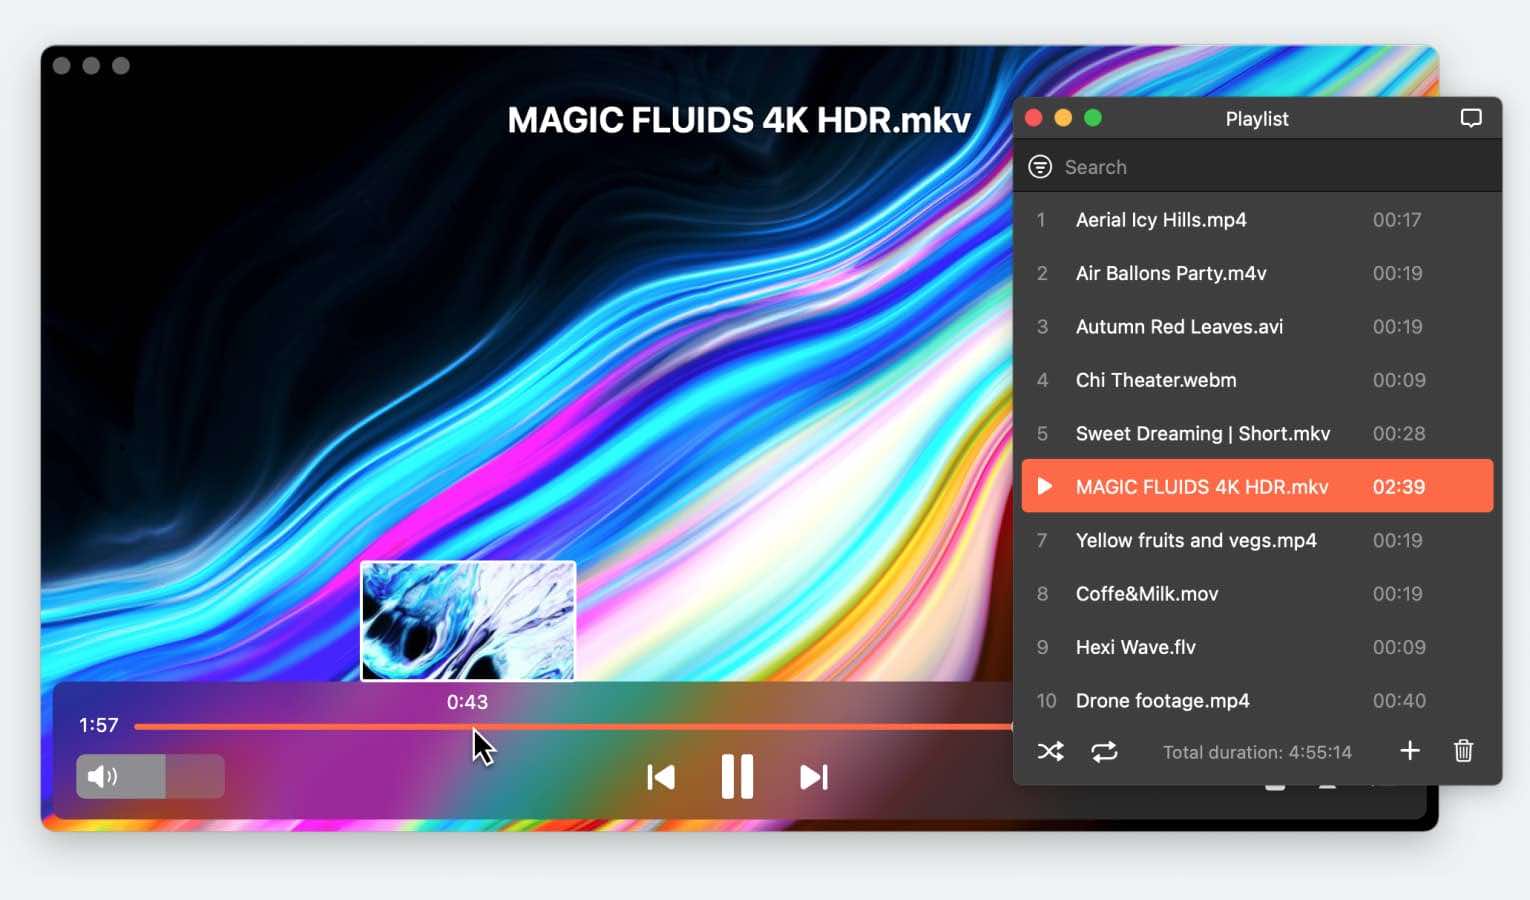
Subtitles make a big difference for a lot of viewers, making movies and videos easier to enjoy. Whether you’re trying to understand a language you’re not familiar with or just making sure you catch all the dialogue, having a video player that supports subtitles can make a huge difference.
If you’re wondering how to add subtitles to videos on Mac, this article is all you need. We’ll explore solutions for popular media players such as Elmedia and VLC that allow you to easily add subtitles to any video.
And if you’re looking to add captions to video on Mac, there are applications like iMovie and DemoCreator, both of which we discuss in this article. This is your ultimate guide about everything you need for captions to have the best viewing experience.
User situation:
I am a lifelong Windows user who got a macbook for school. I have had the M1 Macbook pro since and I like it a lot. I have always been using BS-Player for a long time since it can download subtitles and adjust them by itself so I was wondering if there is a media player on macOS that can do the same thing— from Reddit
Best subtitle player for Mac - Elmedia Player
Elmedia player is one of the most popular video players you’ll find on the market today. It is known best for its ability to handle almost any video format you throw at it, such as MKV, AVI, MP4, MOV, WMV, DAT, MPG, and M4V. You’ll be able to enjoy an unparalleled HD experience without any lagging, sync issues, or disconnection.
Elmedia video player is also great for its subtitle support on macOS. It lets you work with both internal and external subtitles so that you have various options for embedding them in your videos.
You can change the playback speed on the go as well by slowing down or speeding up a video whenever you need. And if you’re dealing with audio that’s out of sync with the video, Elmedia lets you adjust subtitle timing or delay the audio to fix any desync issues.
Another great feature of this media player is the level of customization it offers. You can easily put on your video and tailor your subtitle settings, adjusting the font, size, background, and color according to your own preferences.
As mentioned above, Elmedia Player also offers a powerful streaming feature that lets you cast videos with captions to external devices. There are three main methods to stream them:
- External Subtitles: These are stored in separate files for you to stream directly to your receiving device without any additional processing.
- Embedded Subtitles: These are stored within the video file itself so you can select the desired subtitles directly on the device.
- Burned Subtitles: If your receiving device doesn’t allow you to use external files or embed subtitles, Elmedia can burn the subtitles directly into the video during playback. This includes both text-based and image-based subtitles, such as DVD VOBSUBs or Bluray PGS.
These features prove how Elmedia Player is a fantastic all-in-one solution for viewing your media content.
Pros
- Supports almost a wide range of media file formats.
- Supports subtitles in formats .ass, .ssa, .idx, .jss, .rt, .smi, .smil, .srt, .sub, .txt, .utf, .vtt, and .webvtt.
- No codes or plugins required.
- Ability to stream across different devices.
Cons
- PRO version is required to open additional features.
How to Add Subtitles to Movies and Videos on Mac in Elmedia Player
Here’s a brief guide on how to add video subtitles on Mac using Elmedia Player (we’ll describe the process for MP4 videos, but they are applicable for all file types the app supports):
1. Launch and run the Elmedia Player application on your Mac.
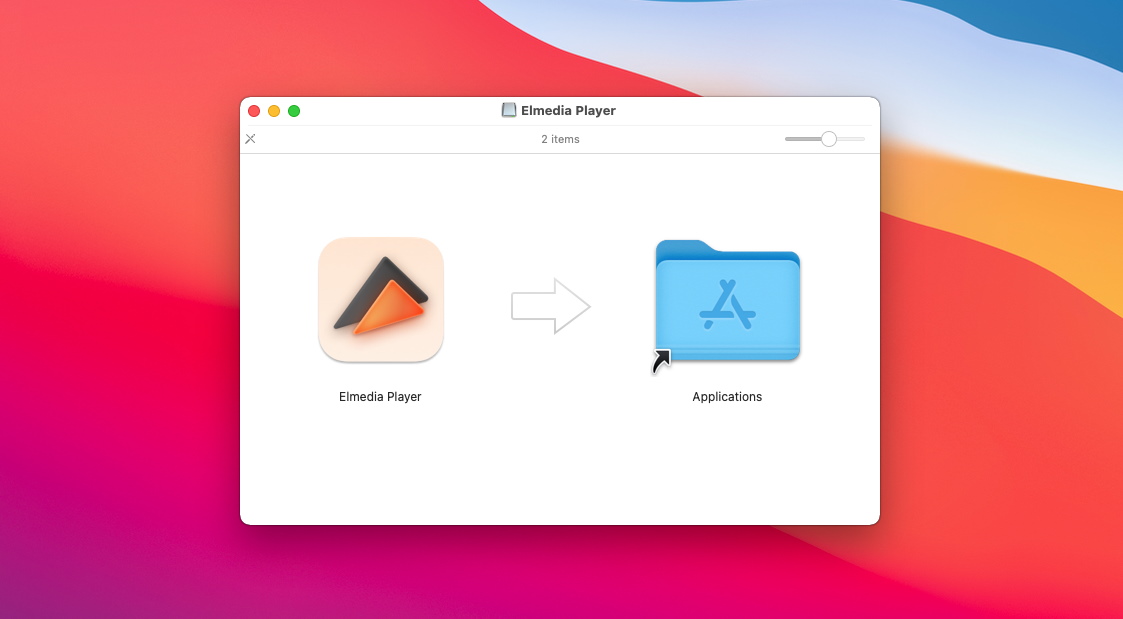
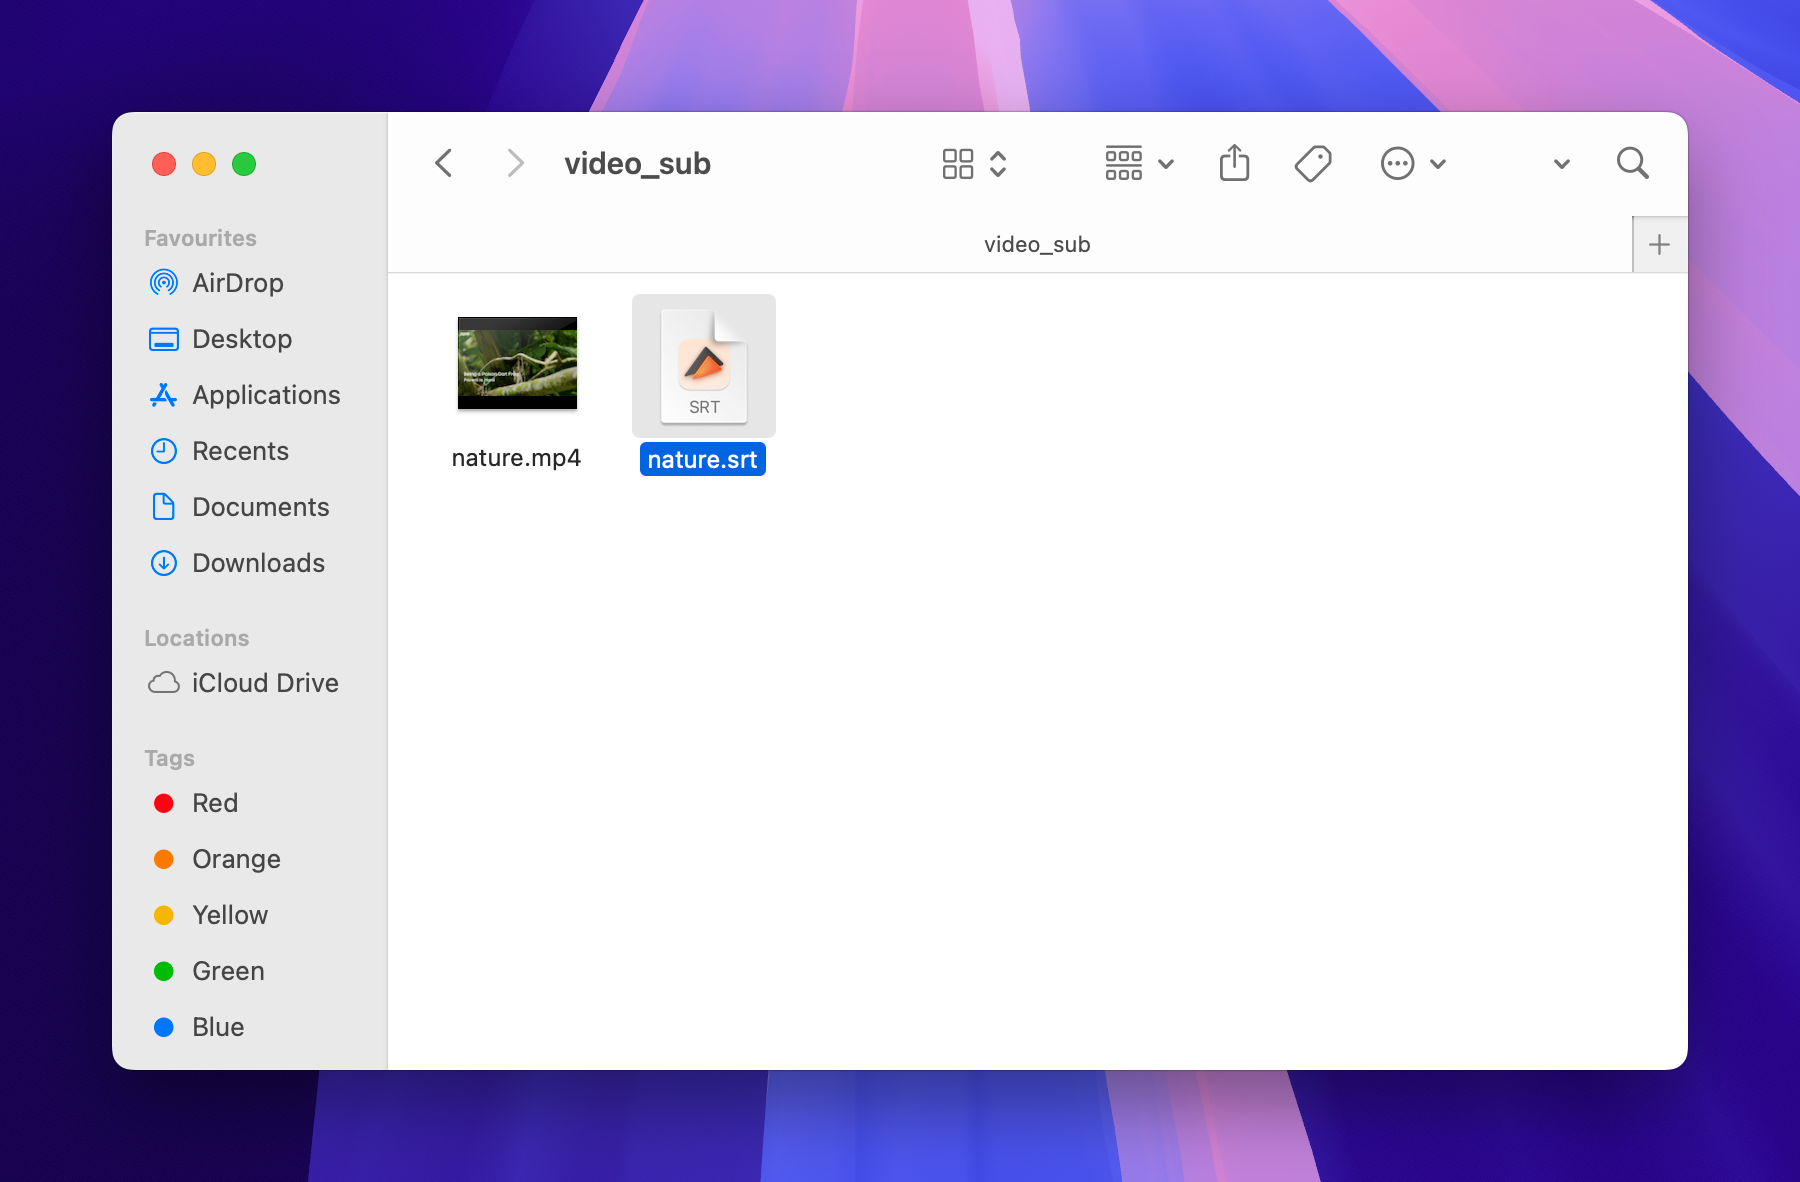
2. To add subtitles to MP4 on a Mac, download the media file and a subtitle file and add them in the same folder.
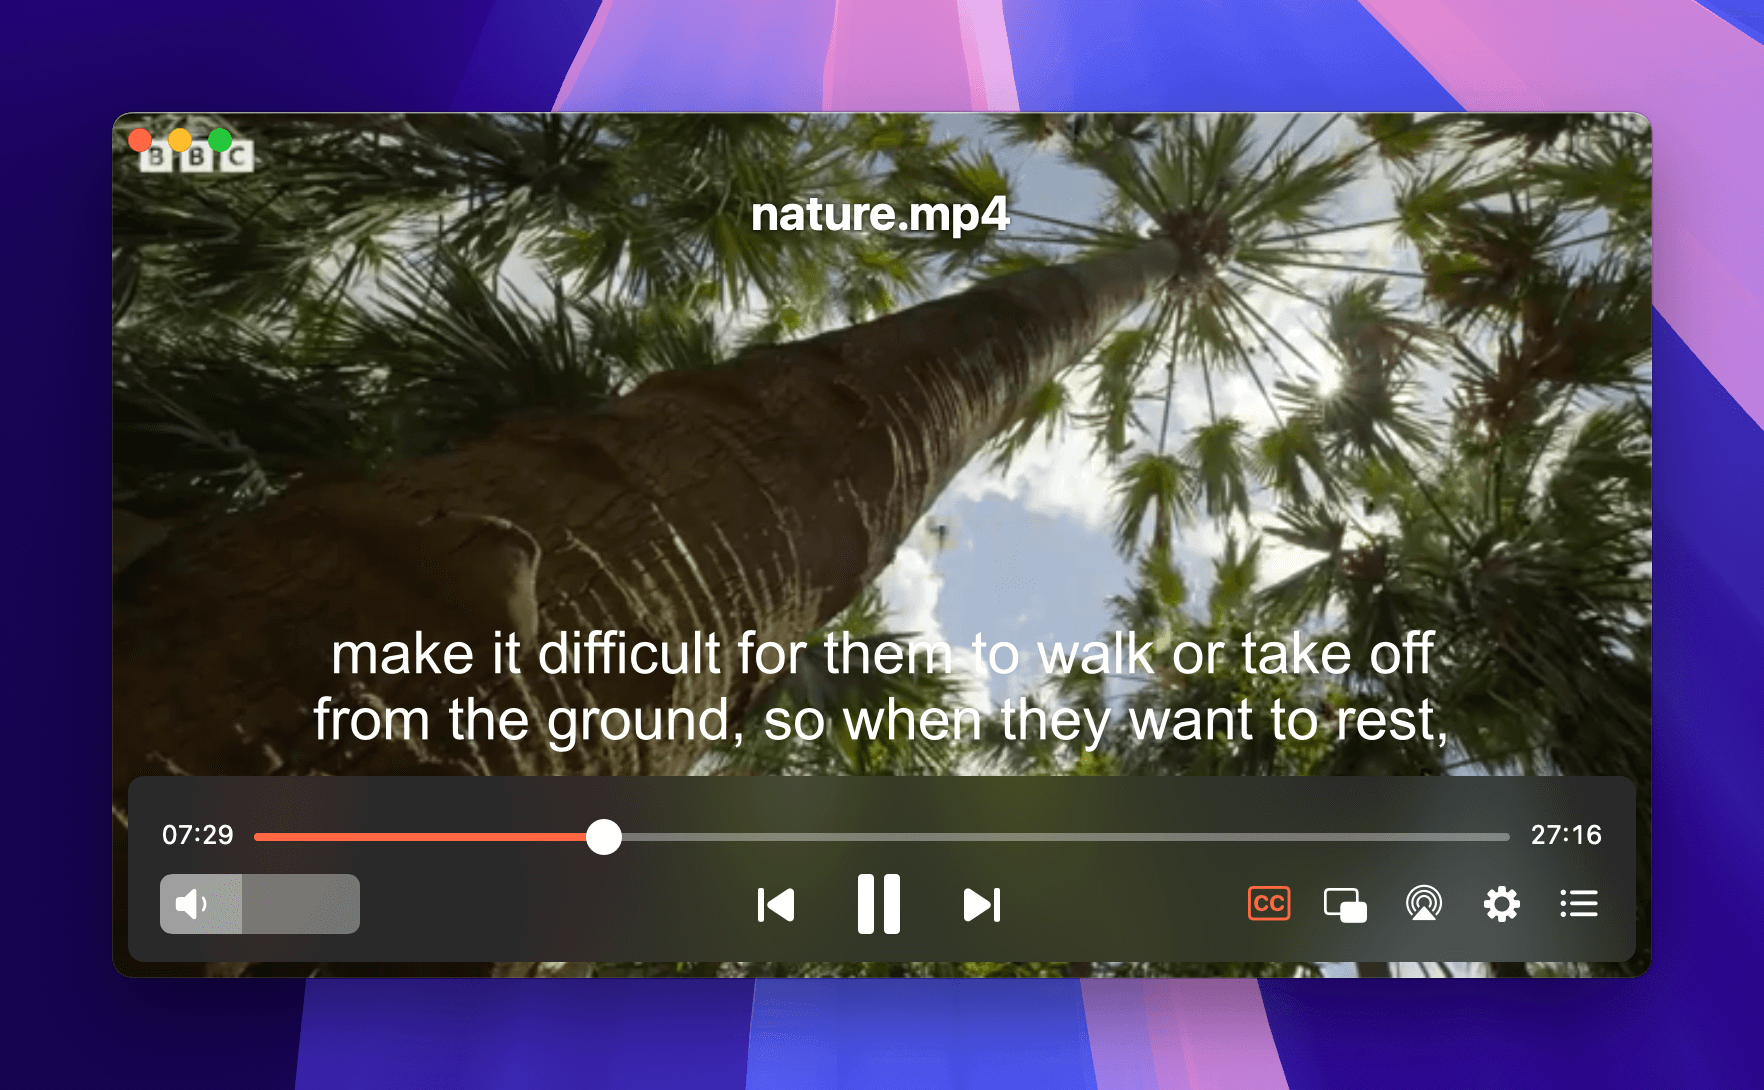
3. Play the video and check if the subtitles appear automatically. If not, click on the “Subtitles” menu in the menu bar.
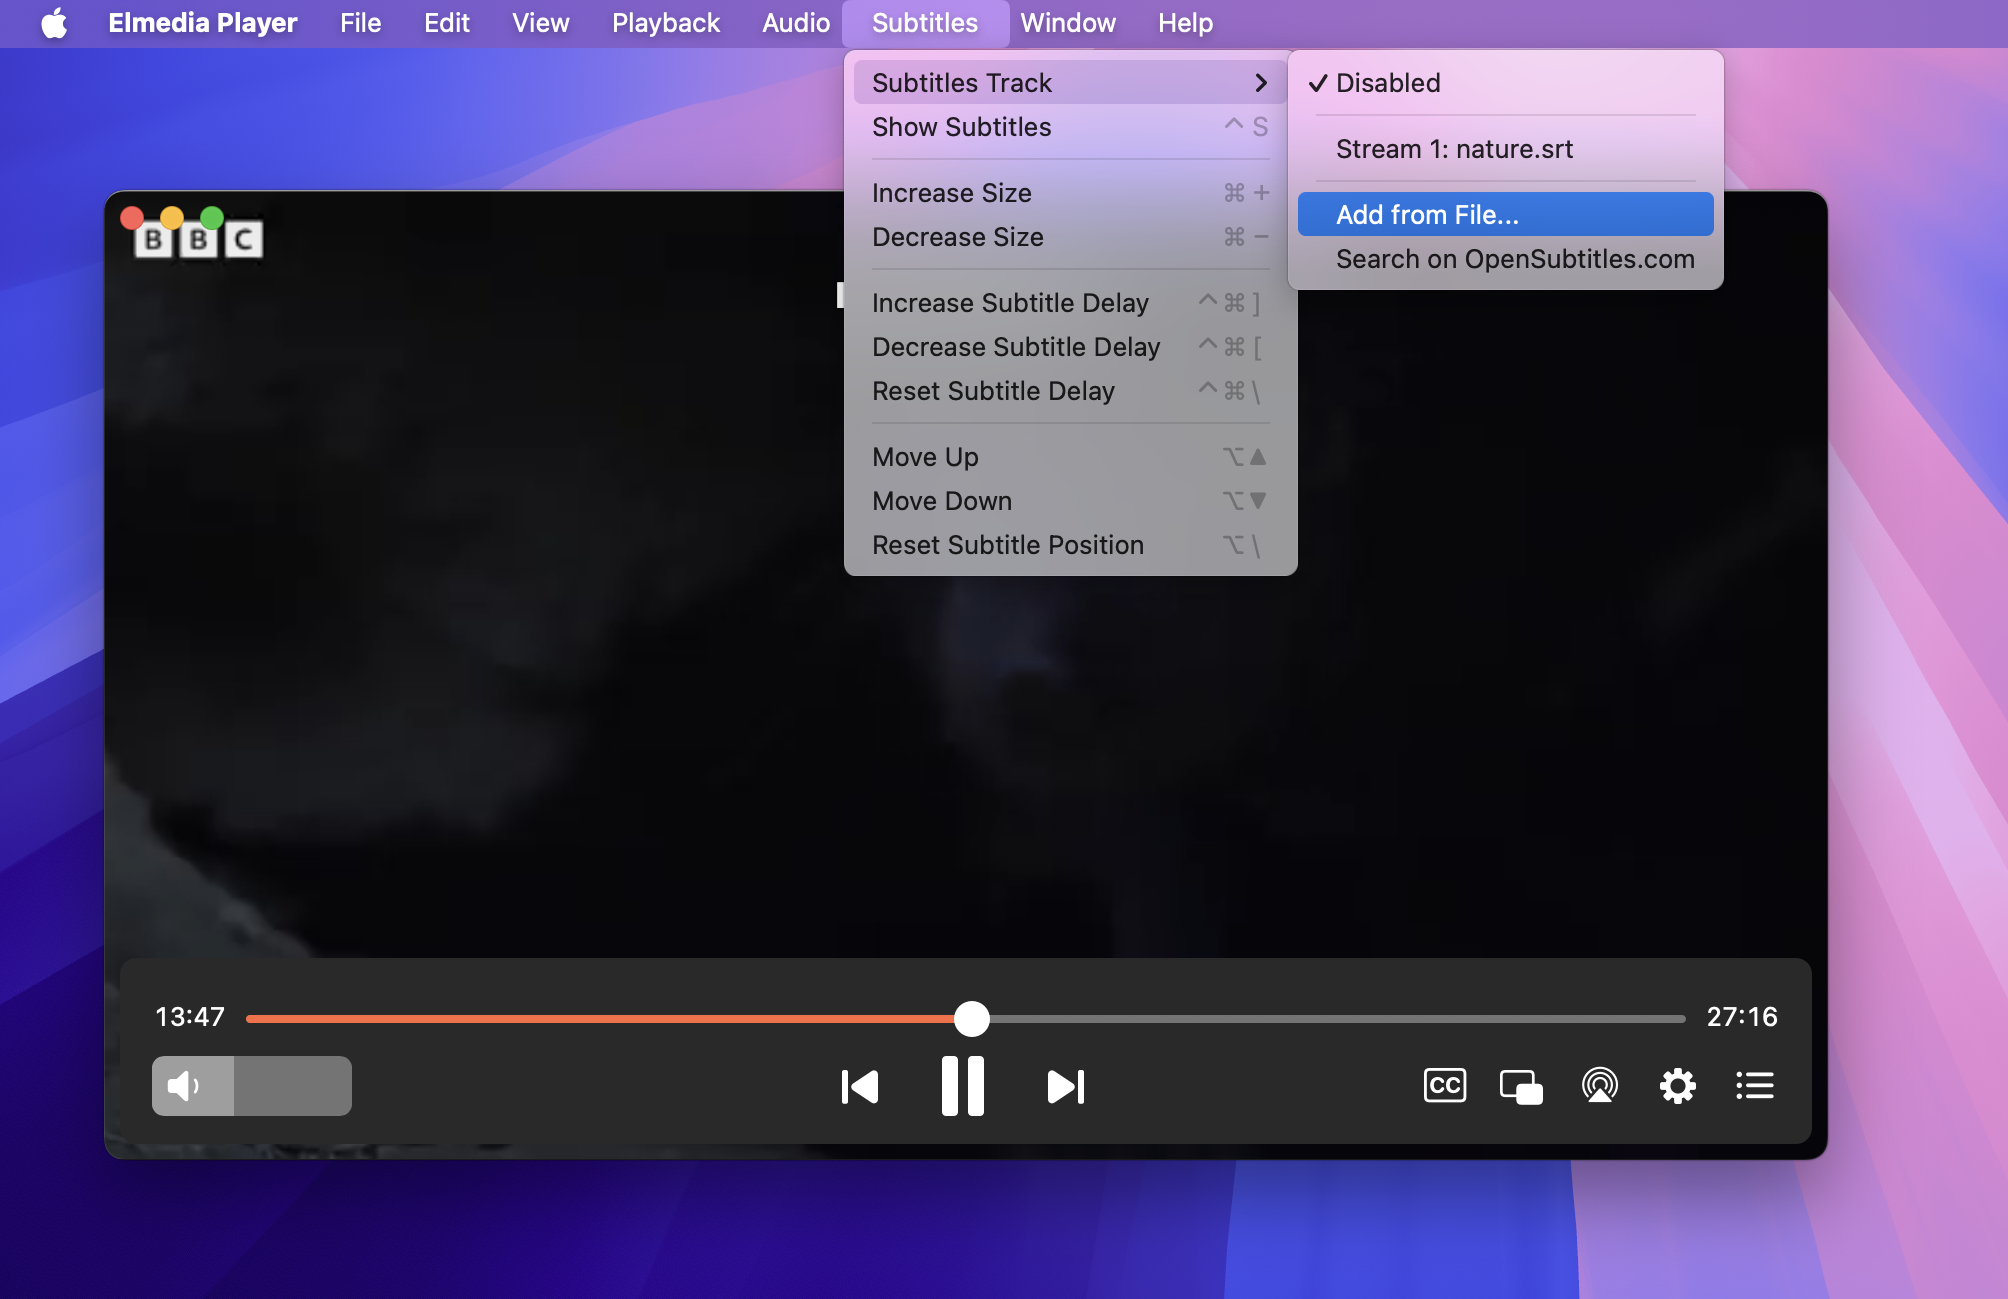
4. Click on “Add Subtitle File” and choose the one you added in your folder. You can customize the appearance with options like font size, color, and background.
5. Resume playing your video and read the subtitles displayed on the screen in sync with the audio. If there are multiple subtitle files, you’ll need to press the “S” key to cycle through various languages.
Add Subtitles to a Downloaded Local Video in VLC Media Player
VLC Media Player is a free and open-source cross-platform media player that allows you to load subtitles in various formats (such as .srt, .sub, .ssa, etc.). It effectively addresses common subtitle issues that you might encounter as a Mac user. You can add subtitles to Mac video by either embedding them directly into the video file or by opening an external subtitle file alongside your video.
Here are the step-by-step instructions for adding subtitles in videos on Mac using VLC Player:
1. Launch the VLC Media Player application on your Mac.
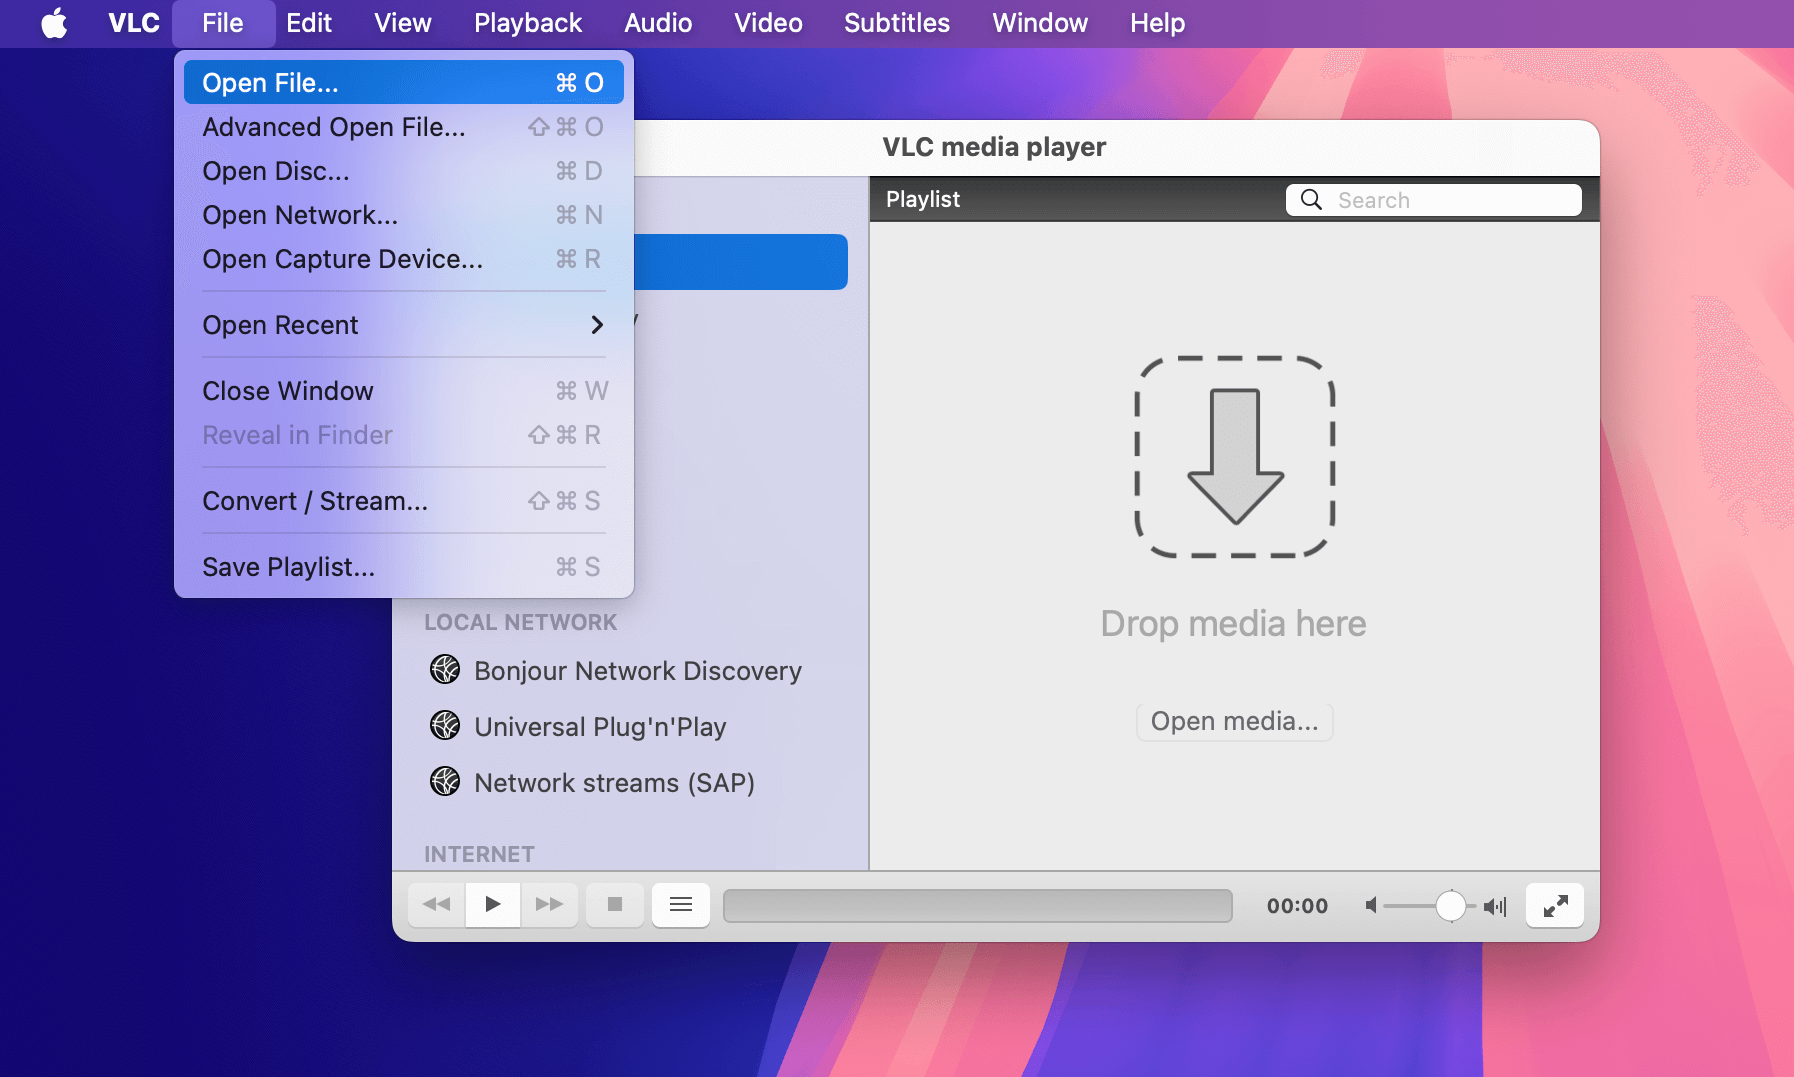
2. Click on “File” in the menu bar, then select “Open File…” to choose the downloaded video you want to play.
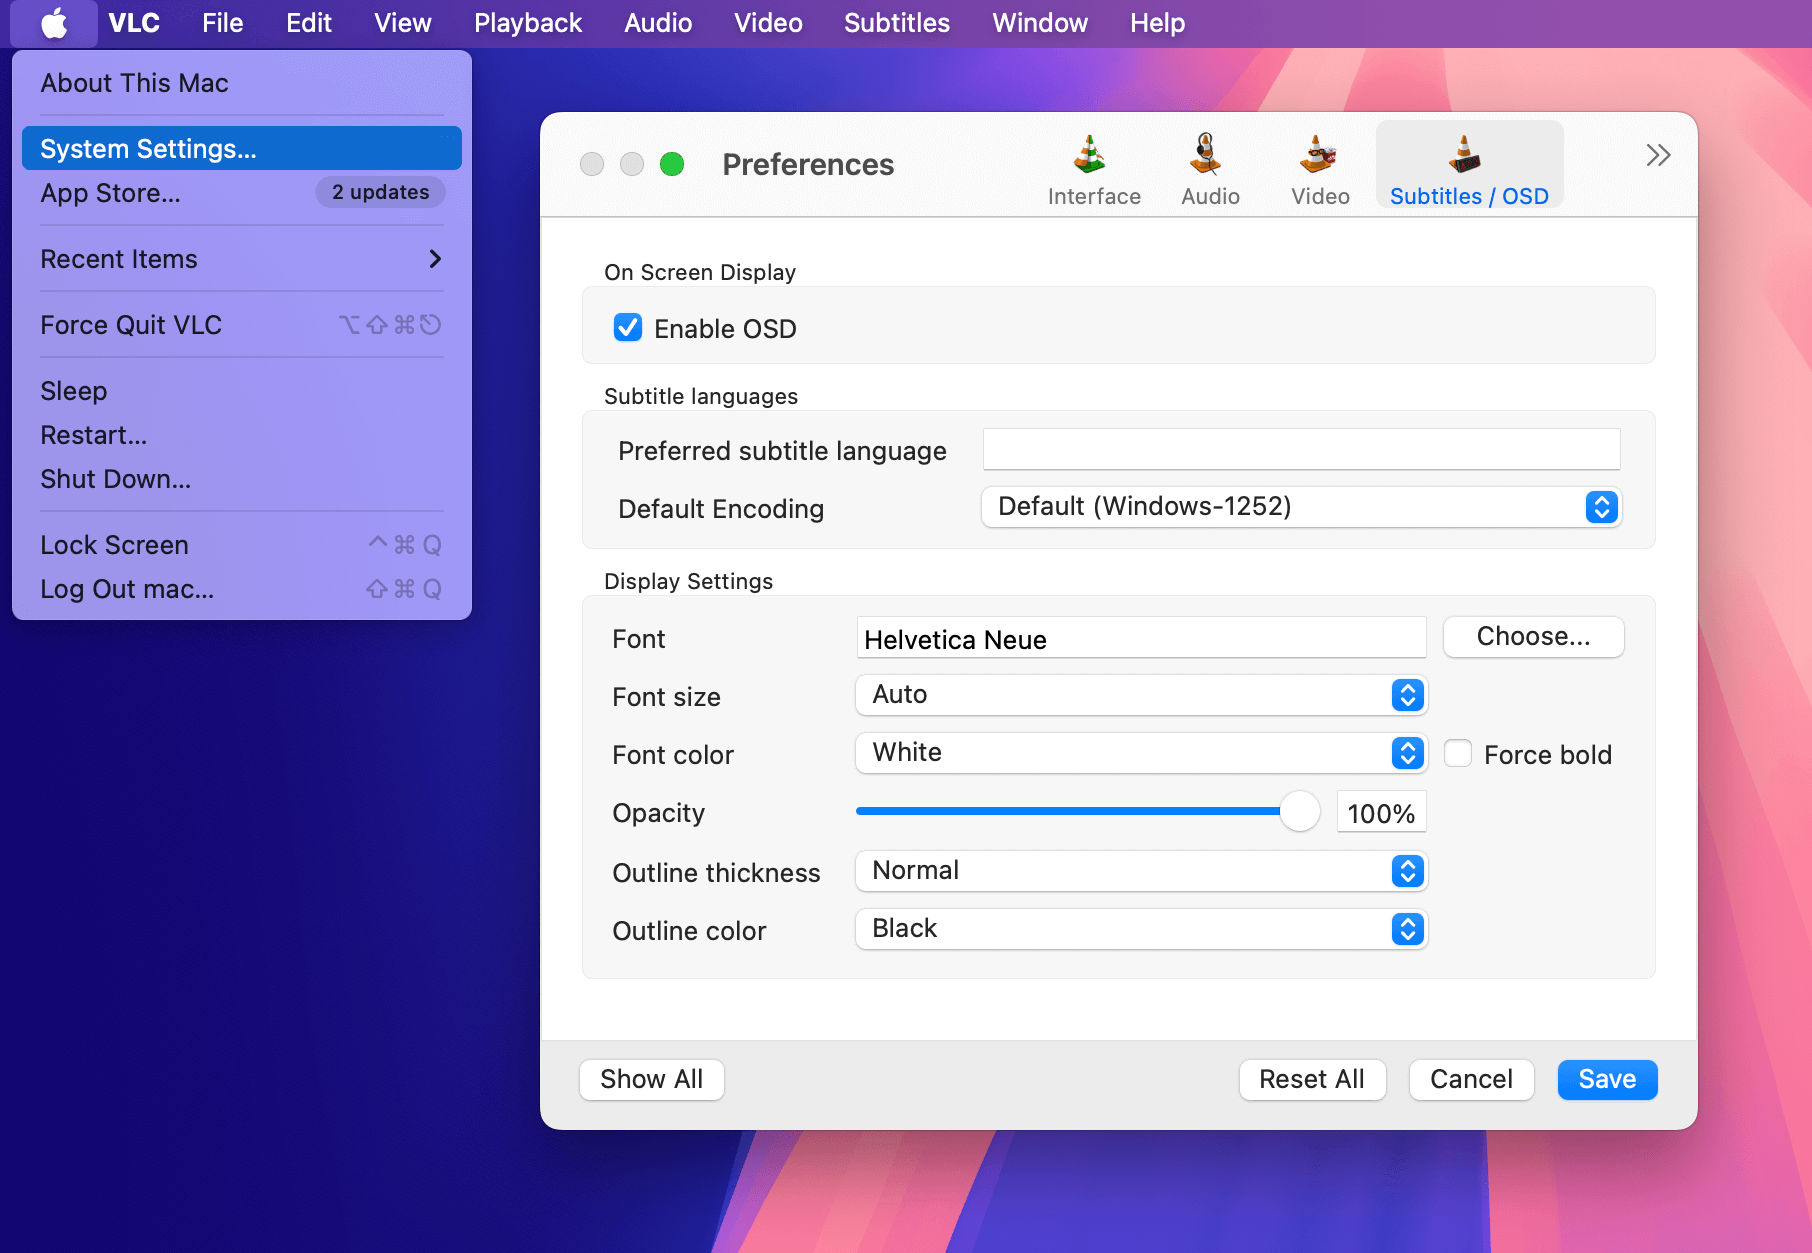
3. Go to the top menu and select VLC > Preferences. Click on the Subtitles/OSD tab and check the box next to “Enable OSD” to enable on-screen display for subtitles.
4. Open your external subtitle file, go to “Subtitles” in the menu bar, then select “Add Subtitle File….” and browse for your file.
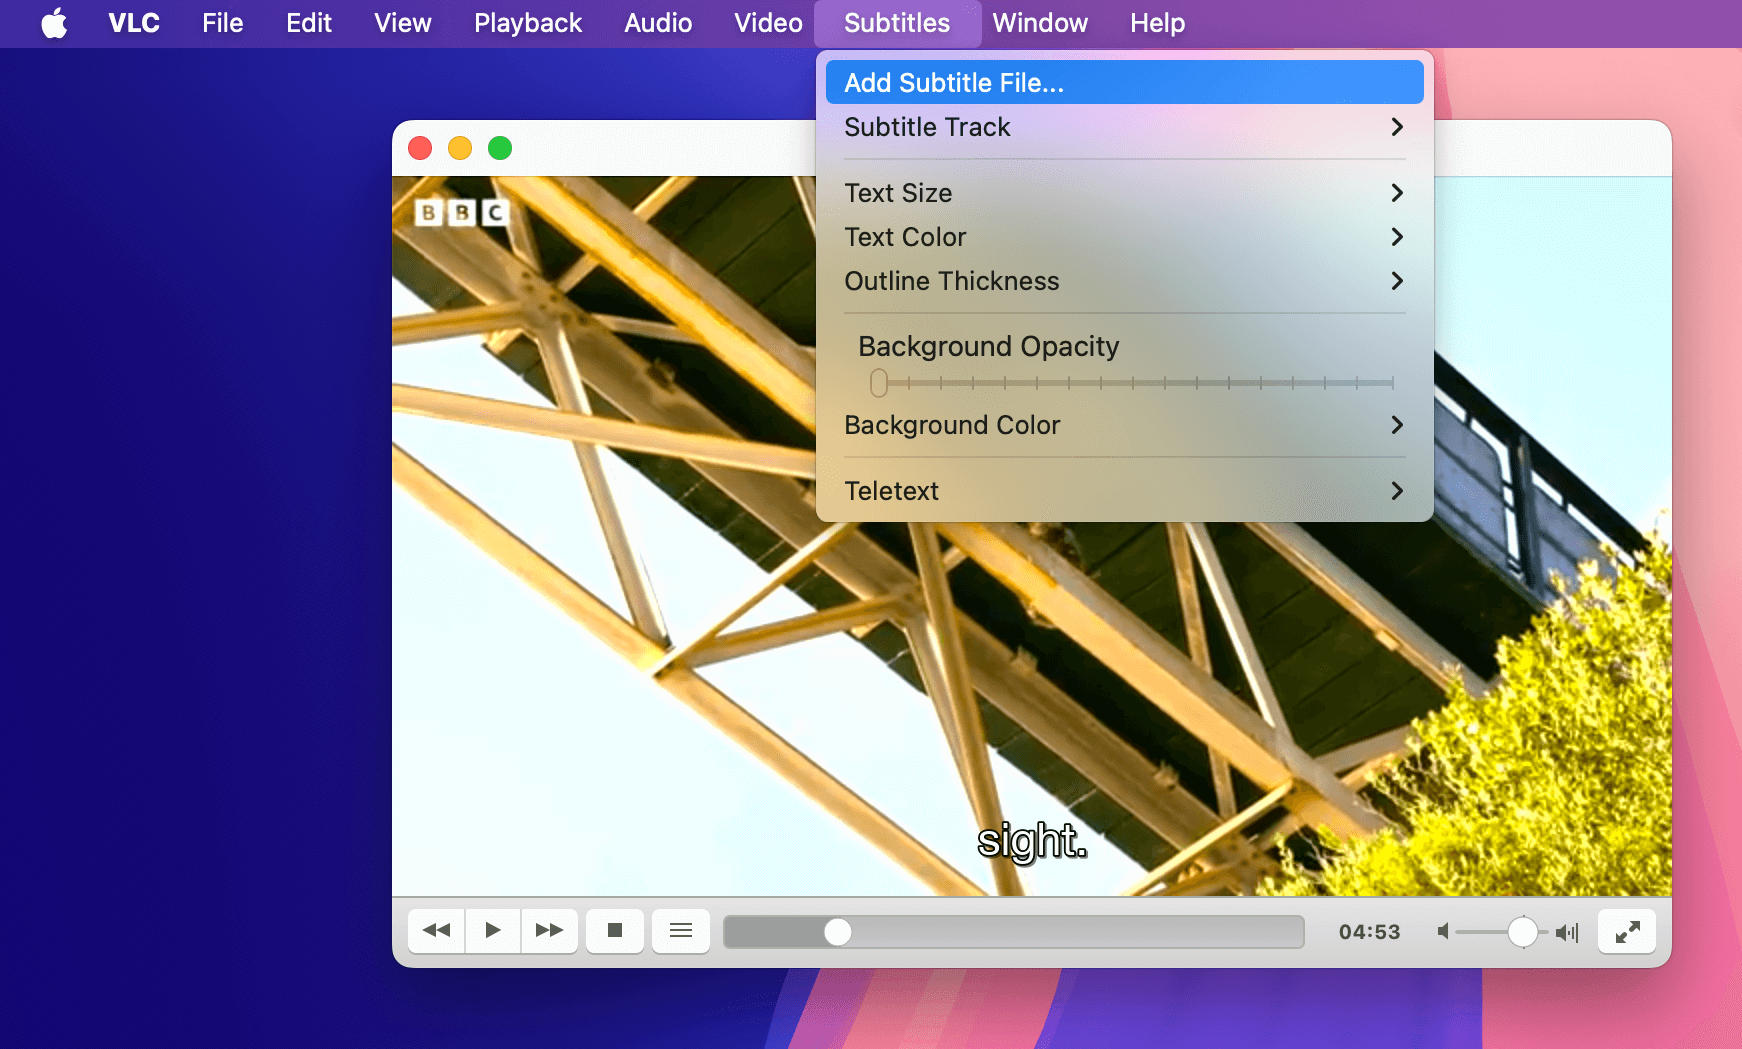
5. Once you’ve added the subtitles, start playing your video. The subtitles should now appear on the screen in sync with the audio.
6. Customize the appearance of the subtitles by going back to VLC > Preferences where you can explore the options under the Subtitles/OSD tab.
Now you’re all set to enjoy your videos with subtitles using VLC Media Player!
Methods For Editing or Creating Your Own Video Clips With Captions/Subtitles
When creating engaging video clips or shorts for social media platforms like YouTube, you need to add captions or subtitles that take the viewer experience to the next level by improving accessibility and engagement. If you’re looking to personalize your videos with text, there are excellent tools available for Mac users.
Built-in software like iMovie allow for easy captioning as is but third-party options like Wondershare’s Auto Subtitle Generator – DemoCreator can offer automated solutions to add your subtitles without a hitch.
Add Captions to a Video with iMovie
If you are editing your iMovie video and want to add subtitles to movie to communicate your message clearly and creatively, you can easily do so by following a few simple steps:
1. Launch iMovie on your Mac.
2. Import your video file to start a new project.
3. Open the video and shift it to the filmstrip section.
4. Click on “Titles” and then choose “Lower” to add your subtitles.
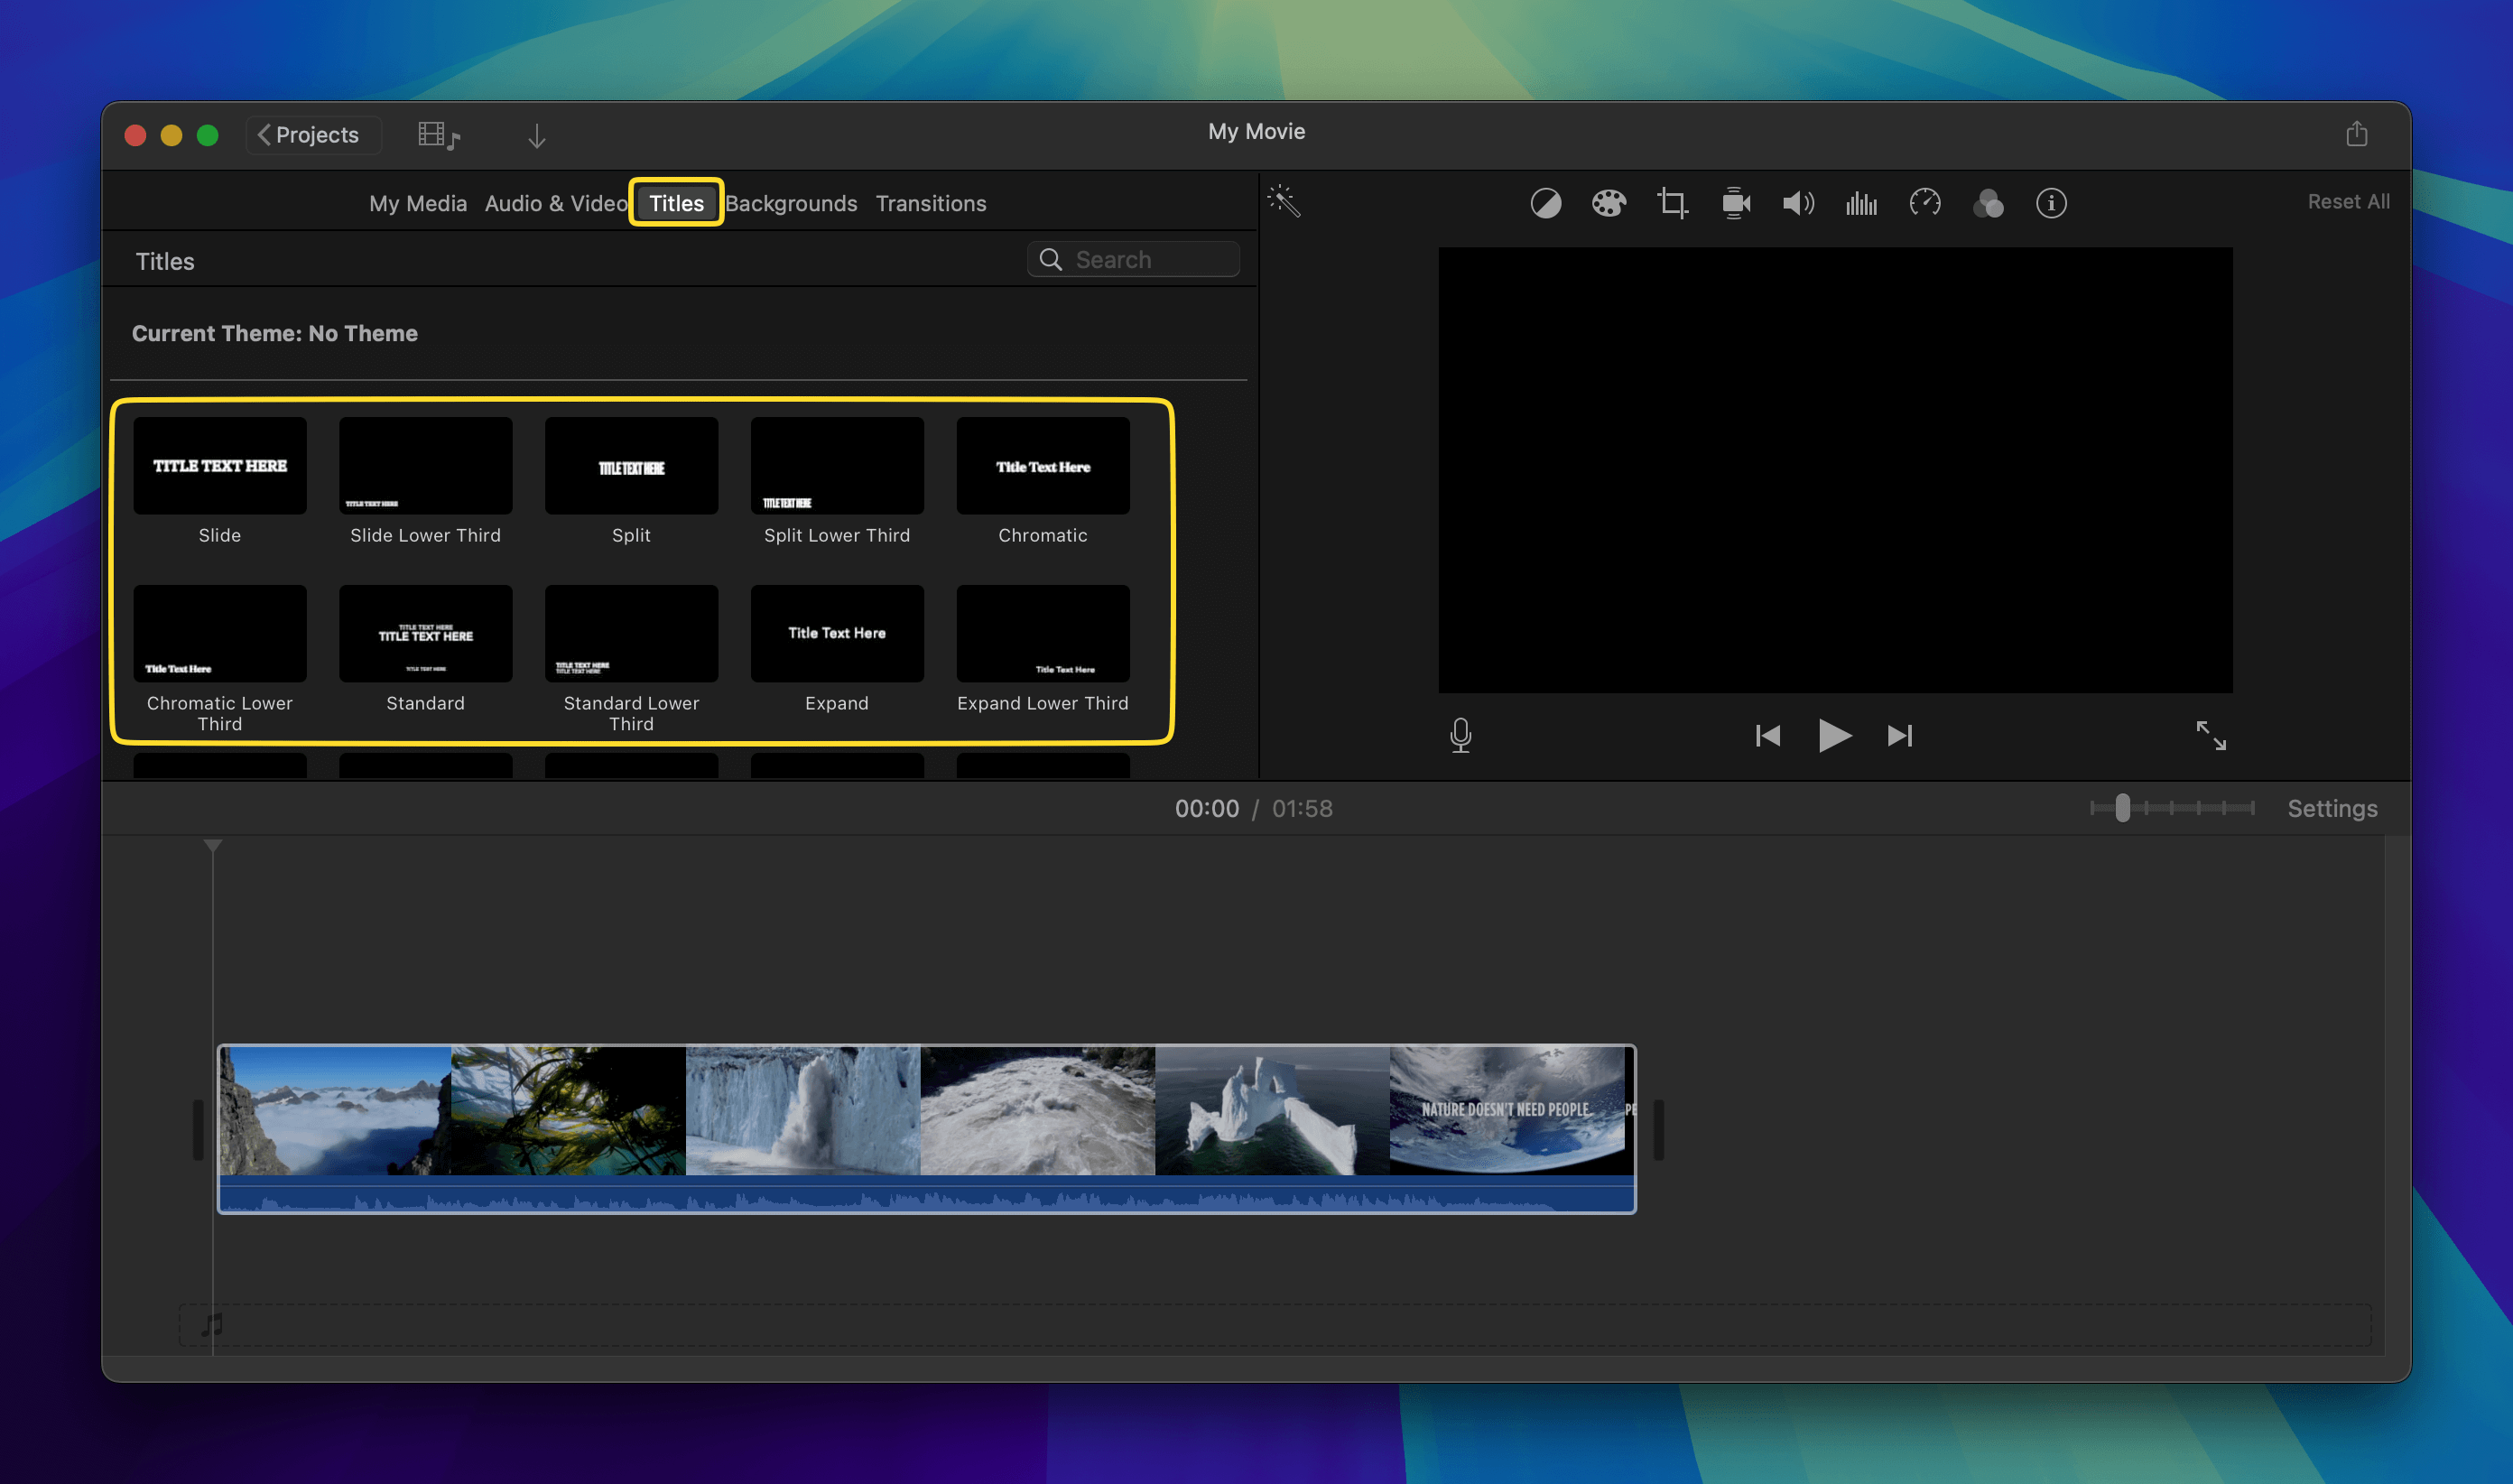
5. Click on the video clip in the timeline where you want to add subtitles.
6. Double-click on the title in the timeline to enter your desired text. Type the caption you want to display and adjust the text size, font, and color as needed using the formatting options in the viewer.
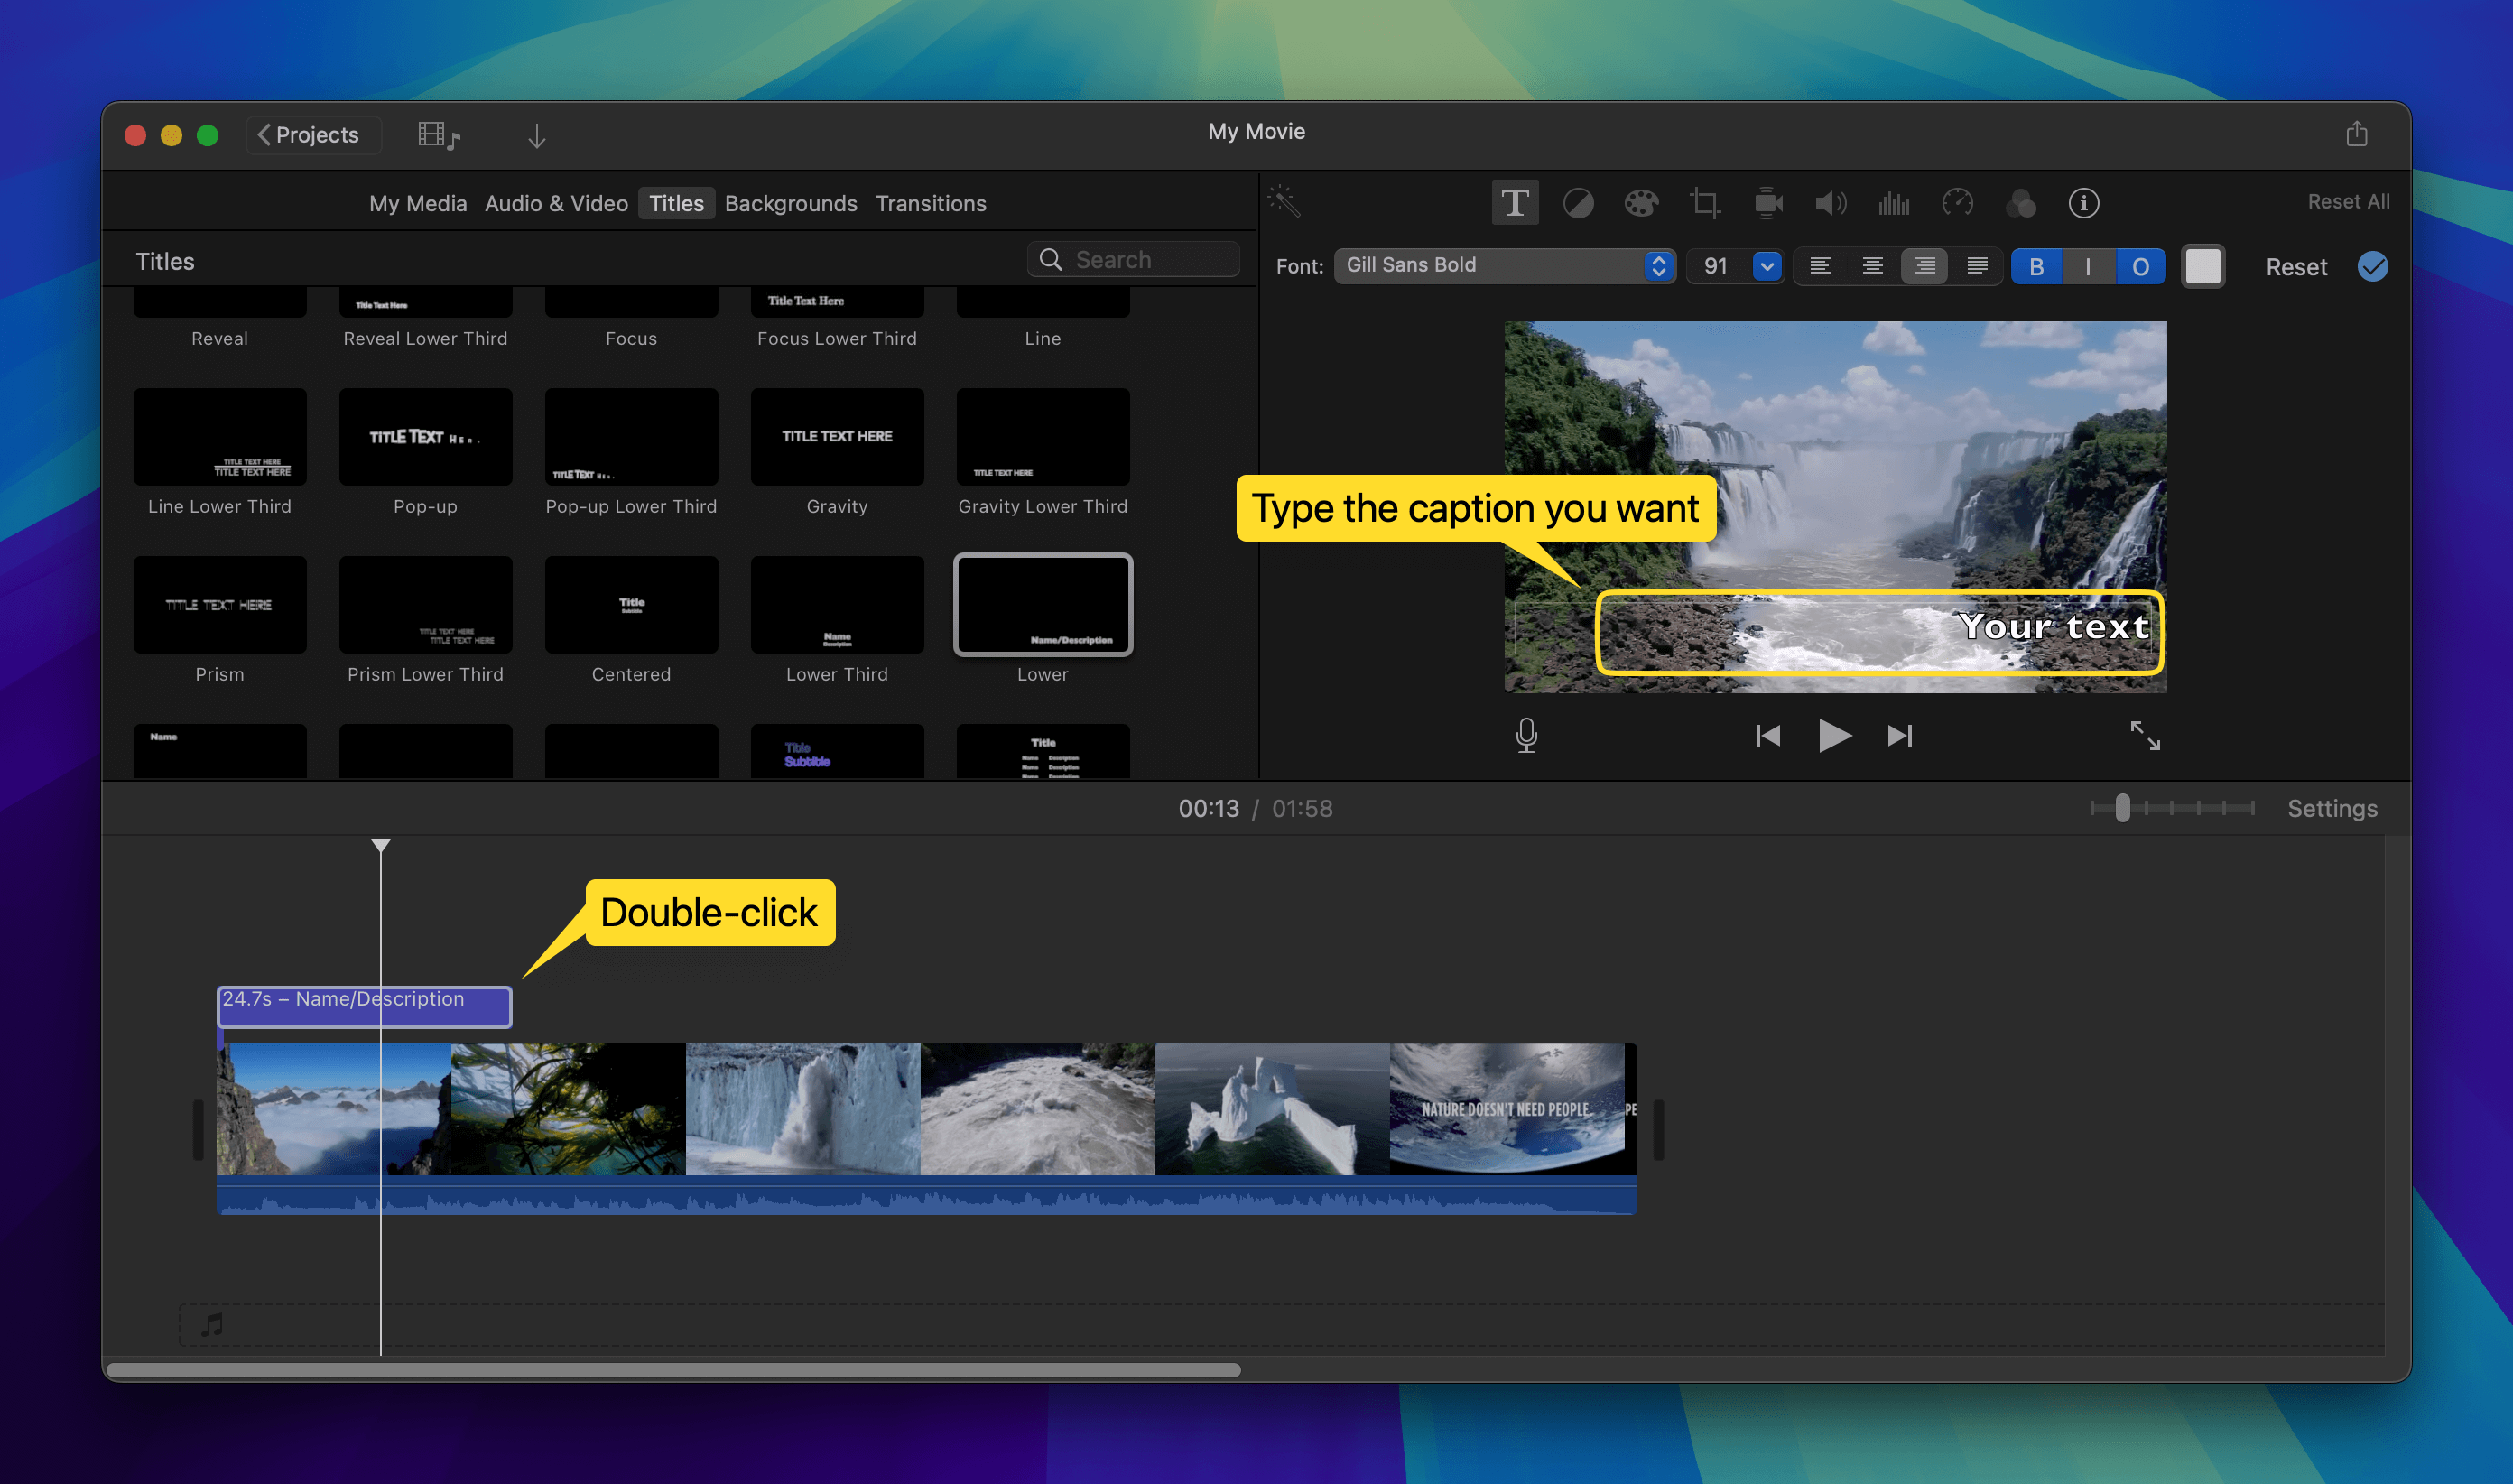
7. Drag the edges of the title clip in the timeline to match the timing of the dialogue or action in your video. Play the video to check the timing.
8. Go to the “File” menu, select “Share,” and choose your preferred method to export your video with the added captions.
By following these steps, you can easily add captions to your iMovie projects and make your work a lot more entertaining and accessible for your audience.
Auto Subtitle Generator
The DemoCreator Auto Caption tool from Wondershare is an excellent app that simplifies the process of adding subtitles to videos. It automatically generates captions by analyzing the audio track of your video, saving you time and effort that would’ve been spent on manual captioning. It has support for multiple languages along with various customization options to match any video’s aesthetic.
Here’s how it works:
1. Open the software and go to “Video Editor.” Click on “Import” to select the file you want to work on.
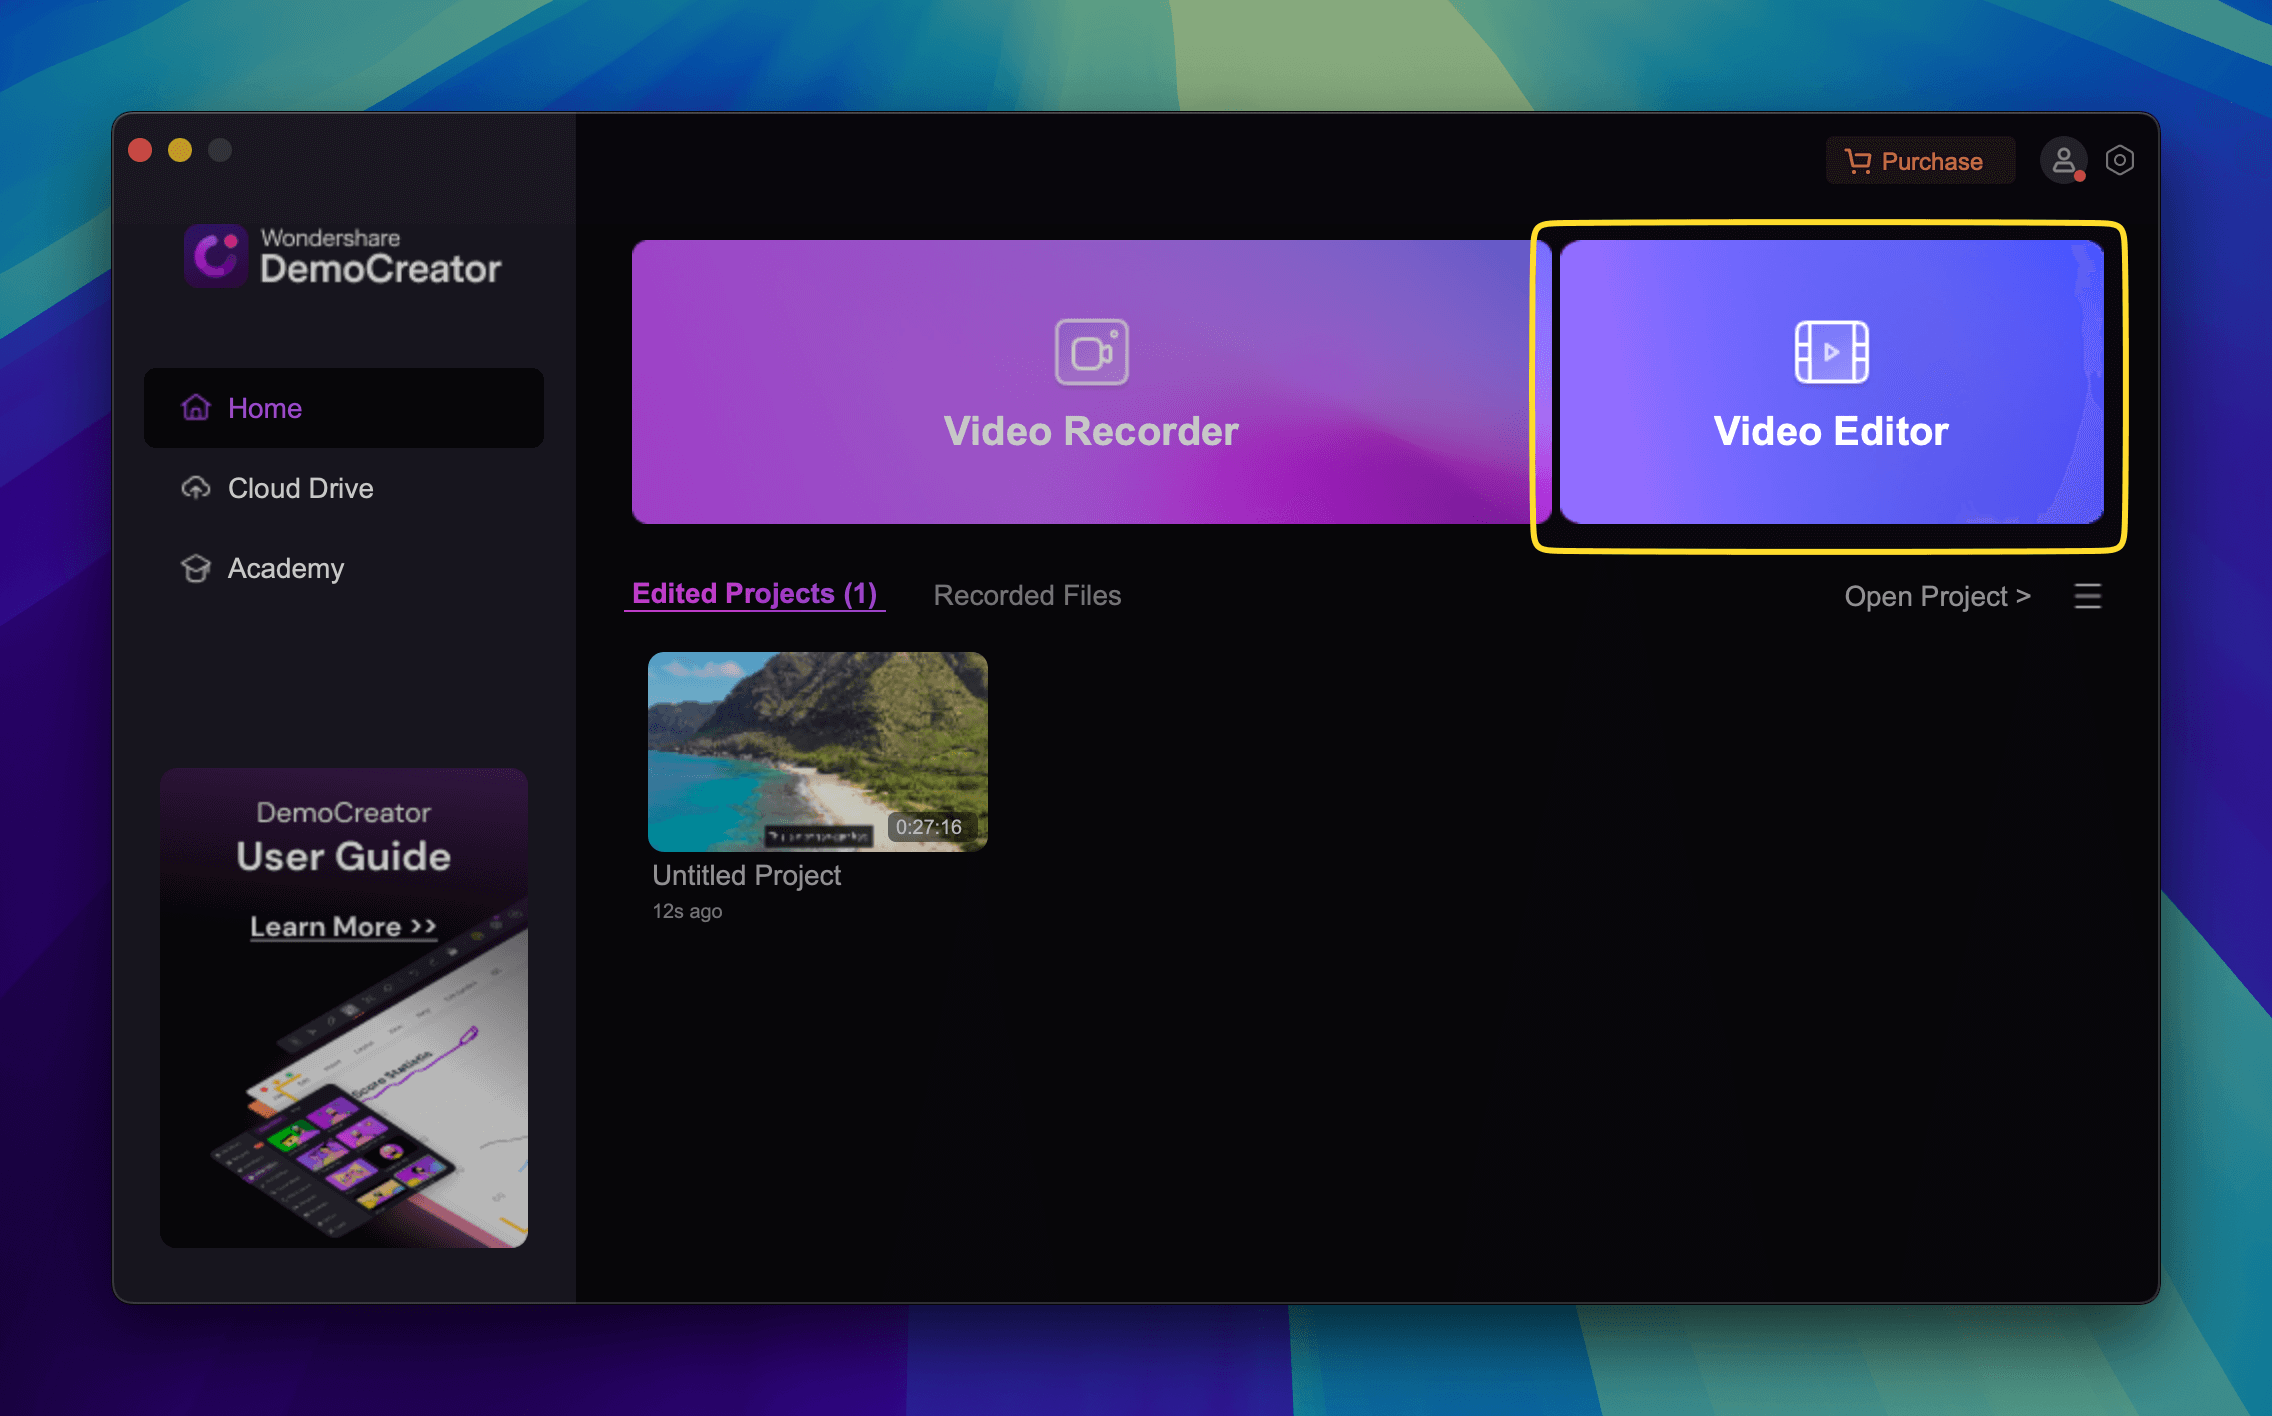
2. Click on the Captions tab and select “Auto Caption” to upload your subtitle file.
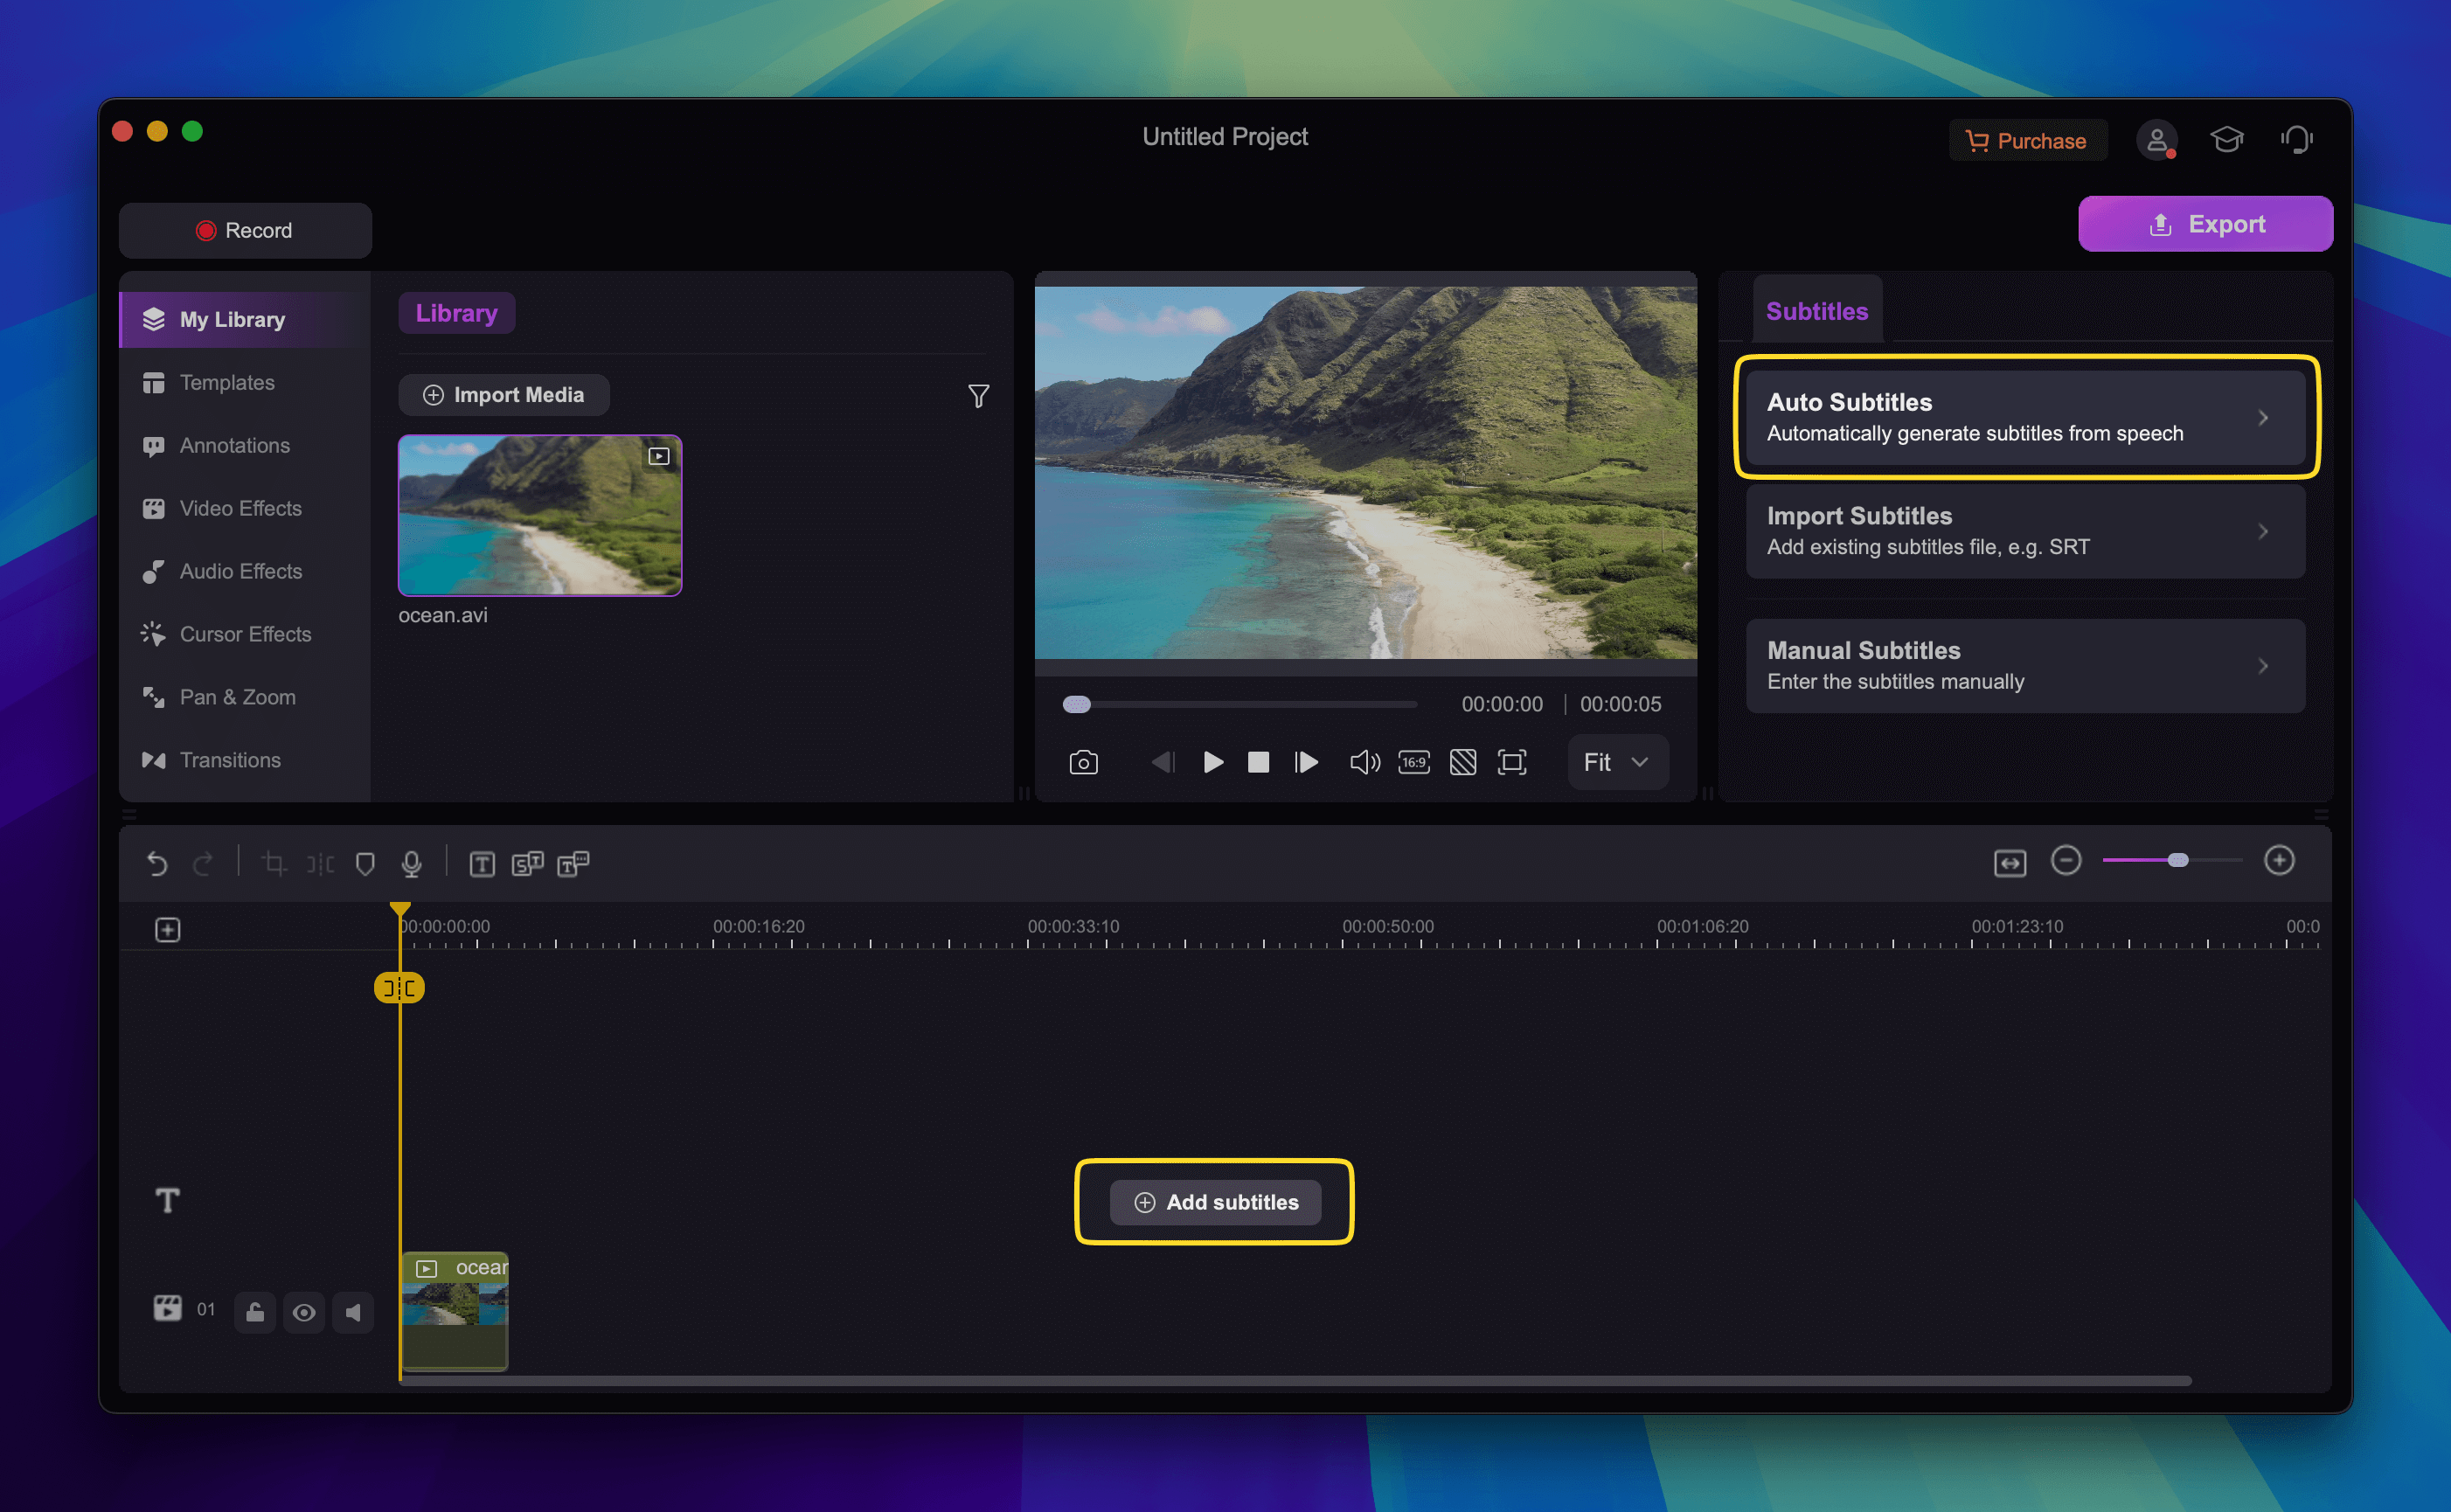
3. Click on “Start to Recognize” to generate auto subtitles.
4. Choose the language you want to use. DemoCreator offers over 90 languages.
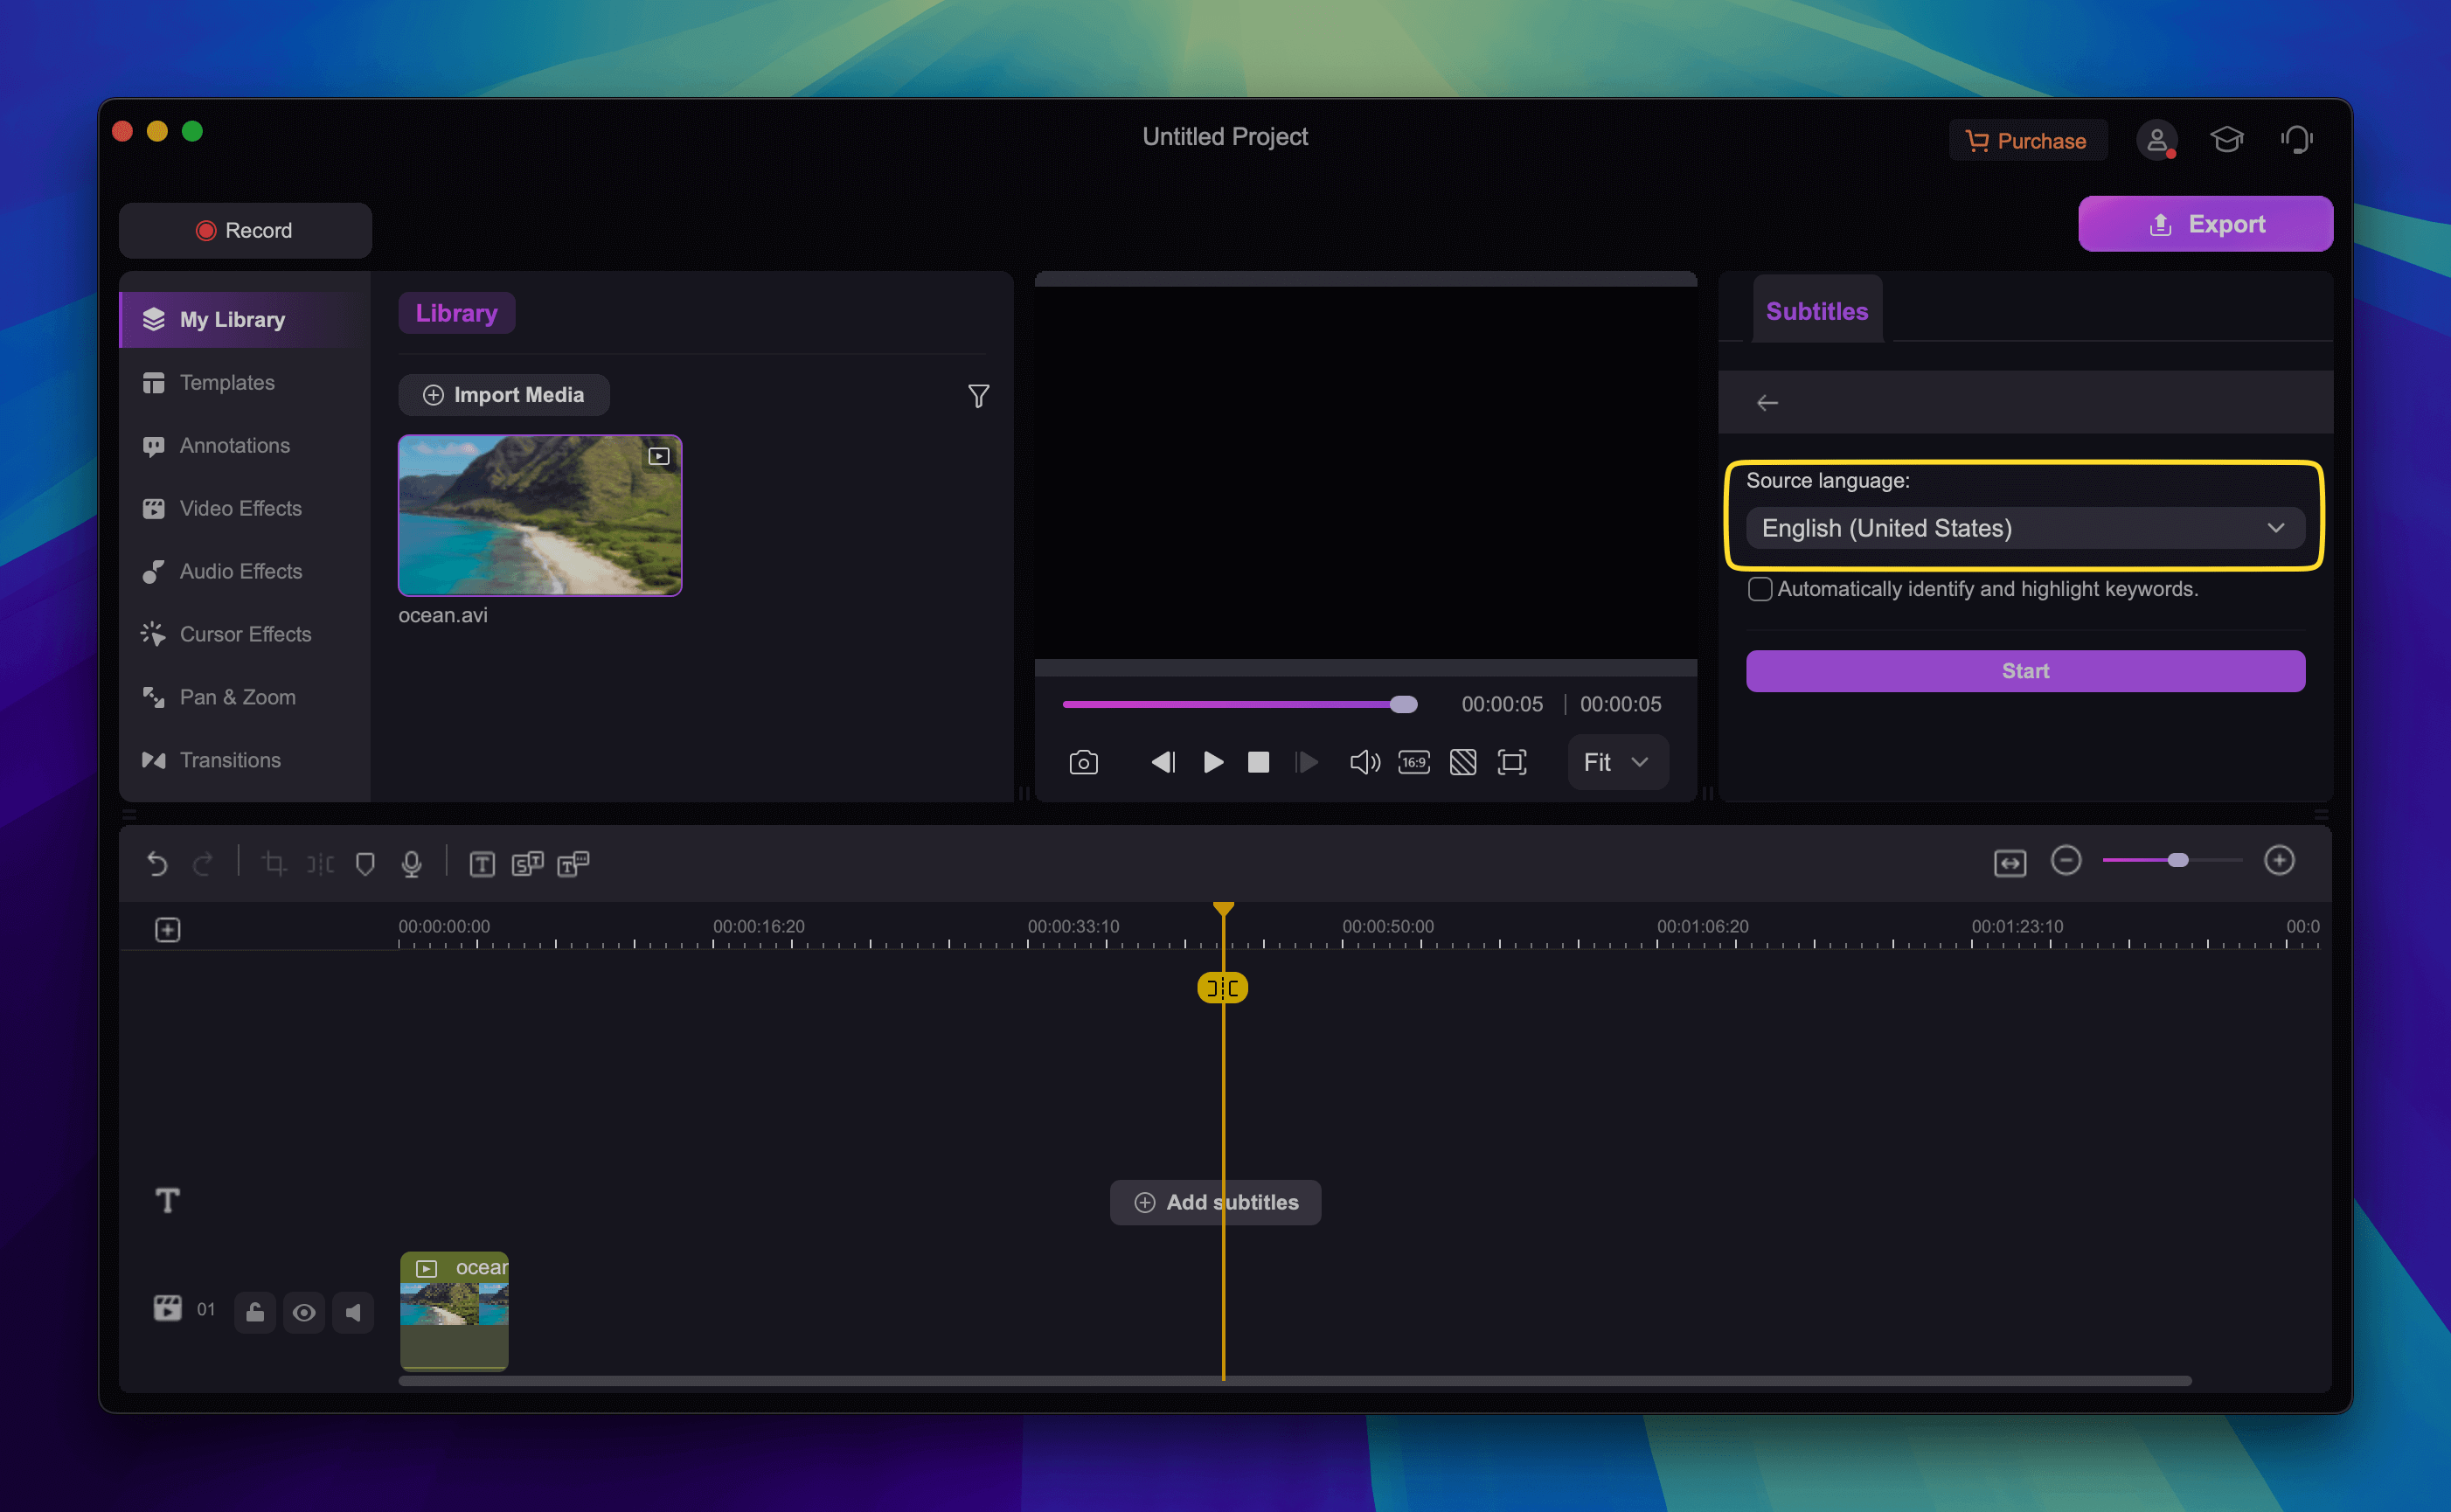
5. Wait for the subtitles to be generated and customize where needed.
6. Export your final result and share it on social media.
The difference between SRT/ASS/SSA Subtitles
SRT (SubRip Subtitle) is a widely used subtitle format made of plain text files with time codes that indicate when subtitles should appear and disappear. It is pretty easy to create and edit, but it doesn’t have any advanced styling options.
On the other hand, ASS (Advanced SubStation Alpha) subtitles offer extensive styling options where you can customize font styles, colors, and screen positioning. You can even add in animations and effects, which can be important if you’re a content creator.
SSA (SubStation Alpha) is similar to this but it has more features. It’s more suitable if you want to enhance your subtitles without any of the complexity of ASS formatting.
Conclusion
Adding subtitles and captions to your videos can make a significant impact, whether you’re a professional crafting content or simply want to make sure you don’t miss a word while watching a movie. With a range of built-in tools and third-party solutions available, Mac users have plenty of options to add subtitles to videos.
Elmedia Player and VLC are two apps you can use to add downloaded subtitles to your videos or even download new subtitle files through their built-in features. If you want to add captions to videos yourself, then we recommend checking out iMovie and the DemoCreator Auto Caption tool.
We suggest exploring each option to find the one that suits you best.
Frequently Asked Questions
We’ve mainly discussed Elmedia Player and VLC Media Player in this article, but QuickTime is also a viable option. Choose the tool that best suits your needs for adding subtitles.
Yes, MKV videos can support various subtitle formats, including .srt, .ass, and .ssa.

