How to Increase Storage Space on Your Mac

thumbnail

Although you’ll inevitably consume storage as you use your Mac more often, you should keep at least 10% of your disk space free. Your Mac needs additional space for virtual memory. 

From using external drives to upgrading your iCloud subscription, you can increase your storage for necessary files in numerous ways. Third-party tools also exist, e.g., CloudMounter. Here’s how to increase disk space on Mac.

Option 1. Use an external drive, USB flash, or SD card

You can transfer files and folders from your Mac to external drives, but when doing so, you need to consider the risks. If your drive gets corrupted, you might be unable to retrieve your content. For this reason, it’s a good idea to back your files and folders in a cloud alongside your external drive. 

Hard disk drive (HDD) and solid-state drive (SSD) are the most common external drives. HDD, while slower, is less expensive. On the other hand, SSD makes up for its higher price tag with faster speeds. Choose the one that makes the most sense; SSD is better if you regularly export files. 

SD cards are also a possible alternative for photos, audio, videos, and other file types. Since most new Macs don’t have SD card slots, you can buy SD card adapters with a USB-C port.

You can also use flash drives, but you may need a USB-A to USB-C adapter for older Macs.

Option 2. Extra storage with network-attached storage

Network-attached storage (NAS) devices connect with your router and allow you to wirelessly access your files and folders from your Mac. You can then share these with other computers on the same network. Here’s how to connect NAS:

1. Open Finder.

2. Press “Command+K” or select Go > Connect to Server. 

3. Enter your NAS’s IP address. 

4. Select “Connect”. 

5. Type your login credentials and click on “OK”.

NAS connection on Mac

Option 3. Upgrade your iCloud storage plan

You can change your iCloud plan if you’ve exceeded the 5GB of free storage and don’t want to buy an external hard drive.  

Here’s how to upgrade your iCloud storage from your Mac:

1. Go to the Apple logo and select “System Settings”.

2. Click on your Apple account name and choose “iCloud” on the next page. 

3. Tap “Upgrade to iCloud+”.

4. Choose your preferred plan. You can upgrade up to 12TB of data if needed.

5. Tap “Upgrade to iCloud+” again. 

6. Enter your Apple account details. Then, select “Buy”; if needed, enter your payment details. 

Upgrading of iCloud storage
Note: As an alternative, go to System Settings > Account Storage > Manage > Change Storage Plan.

Option 4. Extended space due to cloud storage

Getting additional storage with a desktop app is significantly easier than having to upload your files via the web. You should also leverage a tool that enables you to upload files from multiple storage platforms and all your accounts across the web. CloudMounter is one option to do this. 

Cloud services normally offer limited storage. For example, OneDrive and Amazon S3 only allow 5GB. Google Drive offers 15GB, which is why it’s a good idea to use multiple platforms at once. Cloud storage managers with various additional features, such as CloudMounter, are therefore useful for convenient file management. You can also edit everything you’ve stored without re-downloading them to your local disk and then upload them back to the tool. The software works in a cloud system, too, meaning that you don’t need to carry around a physical drive (which could result in external media being damaged or lost).

How to add more storage via CloudMounter

This application allows you to access cloud storage without having to visit a website. As a result, you’ll never have to think about how to get more storage on your Mac. You can centralize all your storage and manage your files from several solutions in Finder. 

Here’s how to use CloudMounter on macOS:

1. Download and install the desktop app on your Mac.

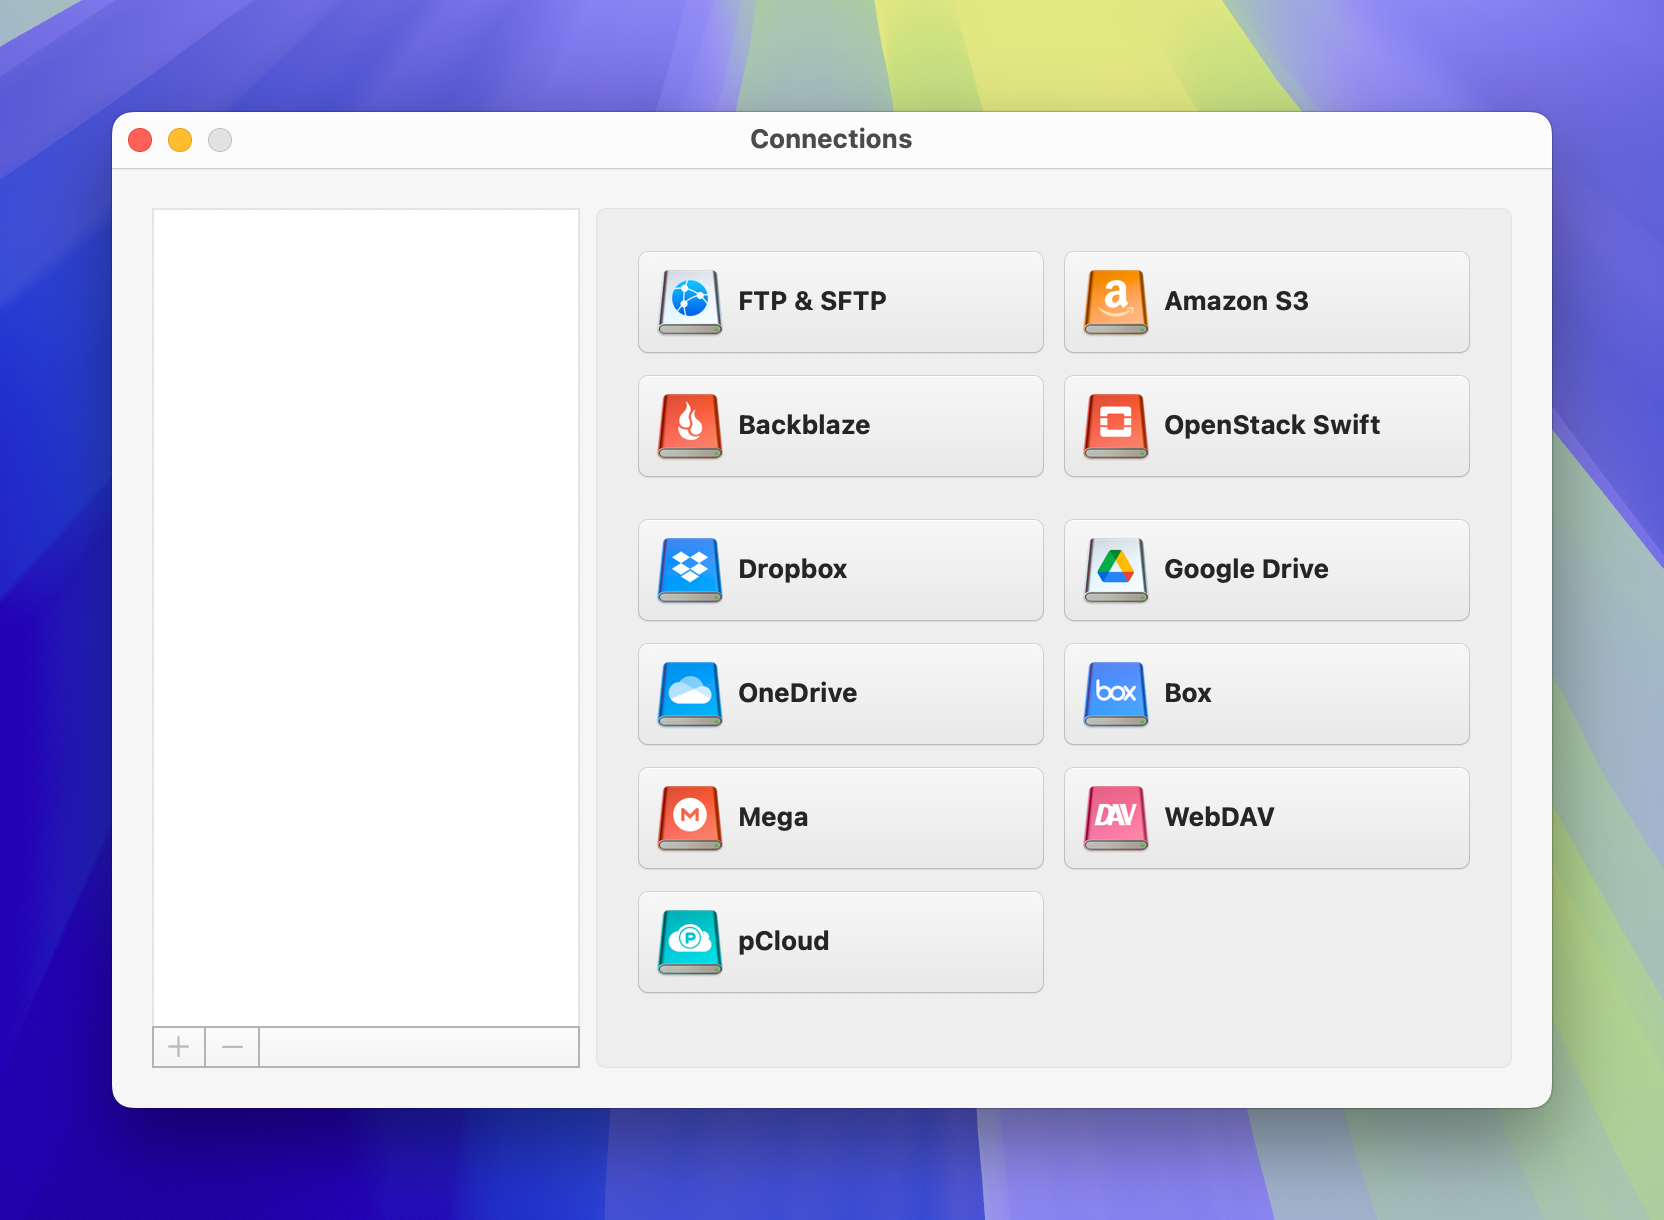
2. Open the application; in the “Connections” menu, choose the storage solutions you wish to connect. 

The connections list in CloudMounter on Mac

3. Enter your login details and connect your cloud storage accounts. Then, once you’ve done that, select “Mount”.

4. Open Finder to manage your files and folders. If you need to move these around, you can drag and drop them. After doing so, you should have more storage space on your device. 

In the future, you can continue dragging and dropping all of your files into the CloudMounter app. By doing this, you should always have enough space on your Mac to perform essential functions and download the latest software updates. Compared to cloud storage tools and their storage restrictions, you should be able to free up more space than would otherwise be possible.

Why else is CloudMounter useful

Our software has numerous other advantages that you should be aware of. Some of the most important ones are:

  • Compatible with Google Drive, AWS S3, Dropbox, OneDrive, Box, Backblaze, Mega, OpenStack, pCloud, and other cloud storage solutions.
  • Remote server file management (e.g. FTP, WebDAV, and SFTP). 
  • Client-side encryption for even better file/folder protection. 
  • Simultaneously manage files from multiple cloud accounts in the same place.

Conclusion

You can extend your MacBook storage in multiple ways; it’s possible to transfer files and folders to an external drive, but you should consider the risks of doing so. Choosing cloud storage is a wise alternative. 

If you’re worried about having multiple accounts and needing to manually re-download and re-upload files, CloudMounter is a handy all-in-one solution. You can access all of your accounts from a single desktop app and edit everything without downloading it again.